Exporting a Pre-made Project to Video
It is practically impossible to export to video using only the provided API. Therefore, it is recommended to create a project in advance using the project editor, and then use the API to query and modify the project to export it to video.
This guide explains the process of modifying a pre-made project and exporting it to video.
- Create a project using the project editor
- Query the project using the API
- Modify the queried project
- Export the project to video using the API
- Check the completion status using the API
1. Creating a Project
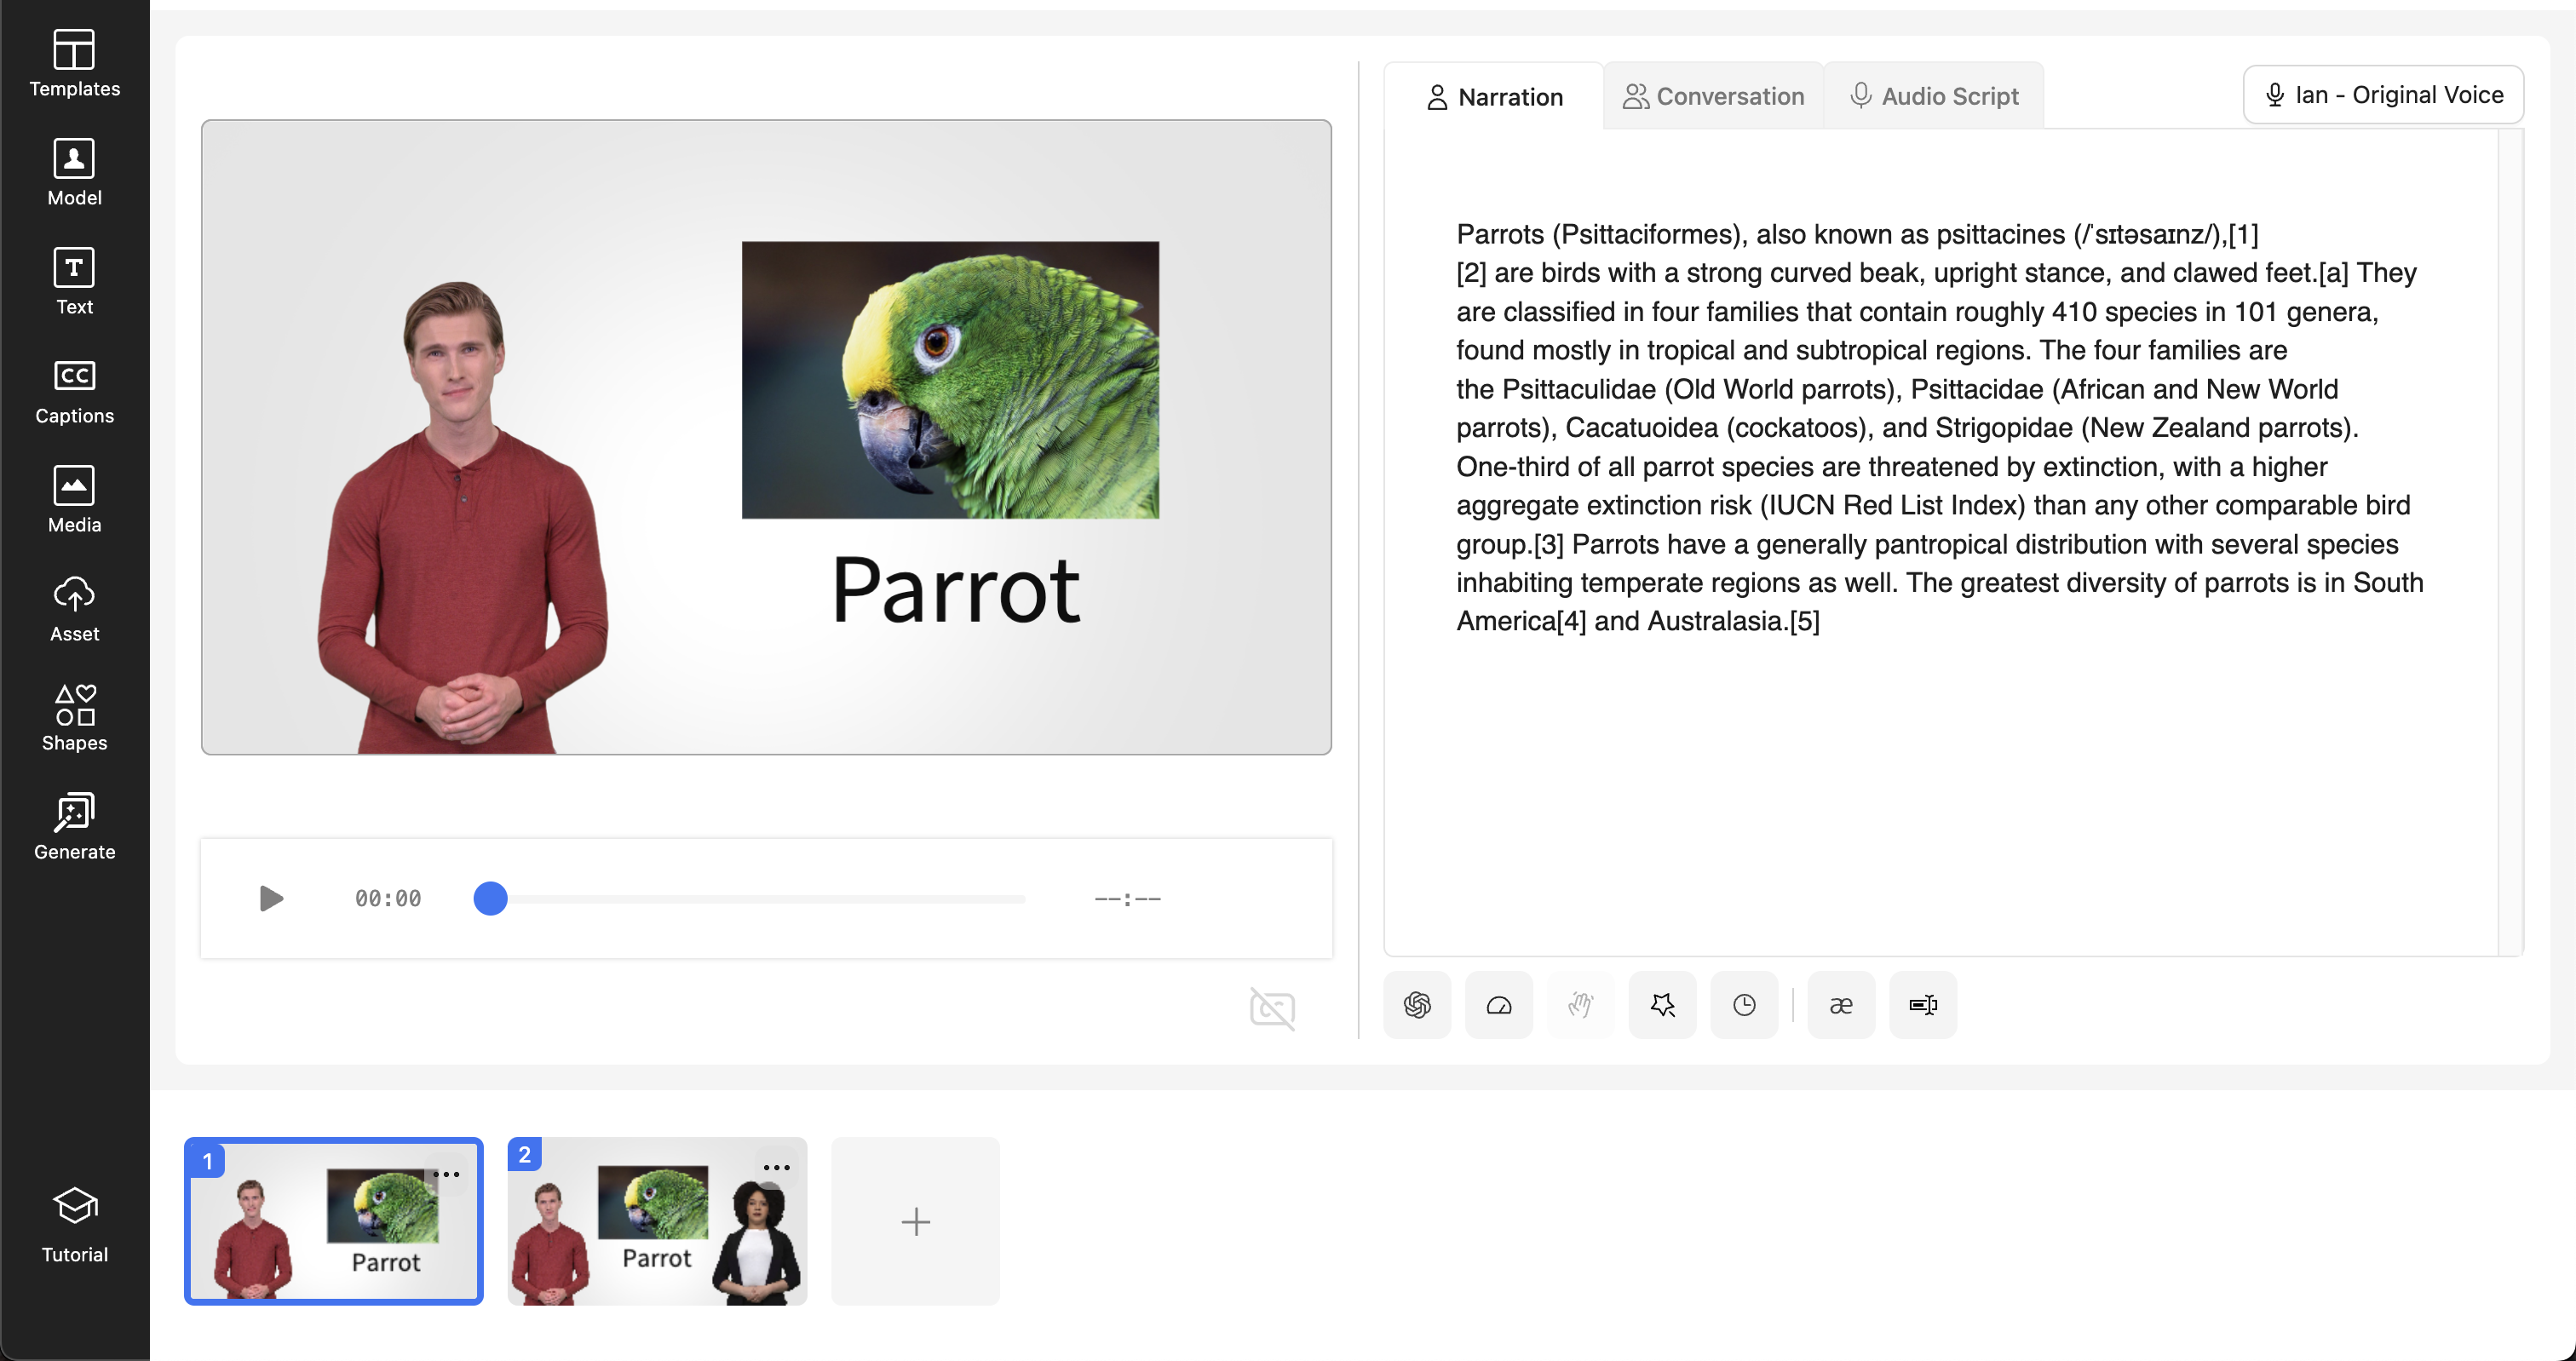
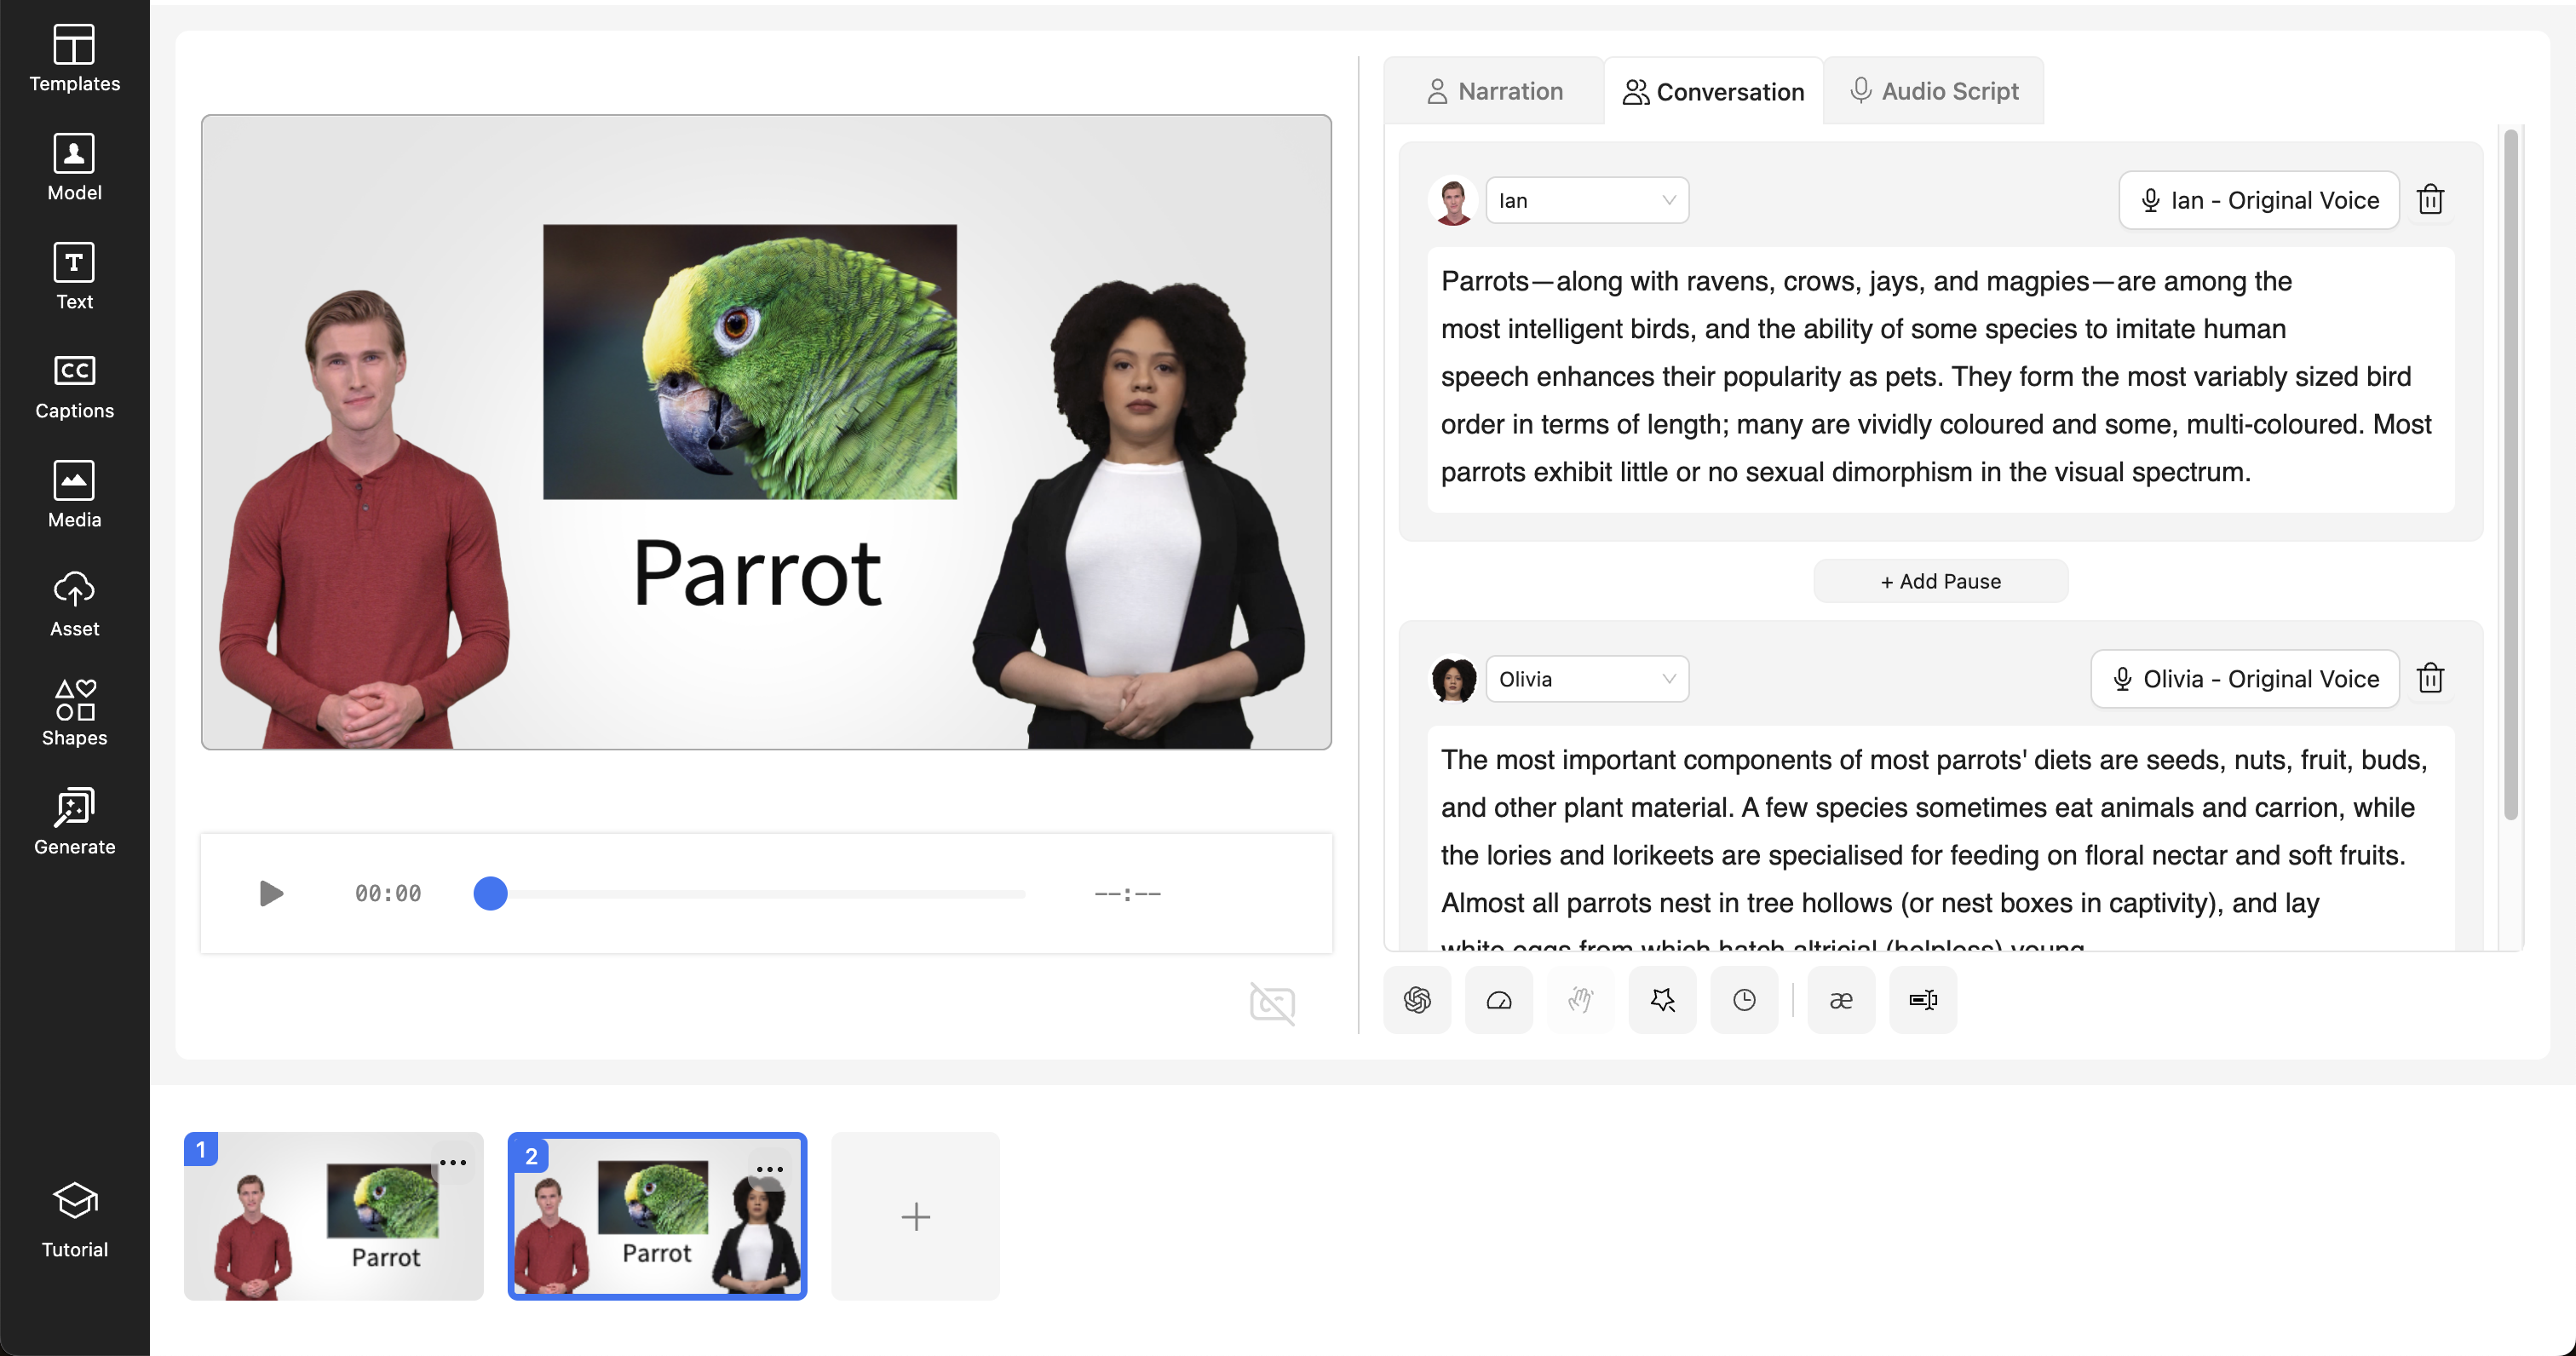
In this guide, we will create a project in advance and modify it to export it to video. The contents to be pre-written in the project are as follows:
- Consists of two scenes
- Each scene contains image and text elements
- Each scene has avatar dialogues
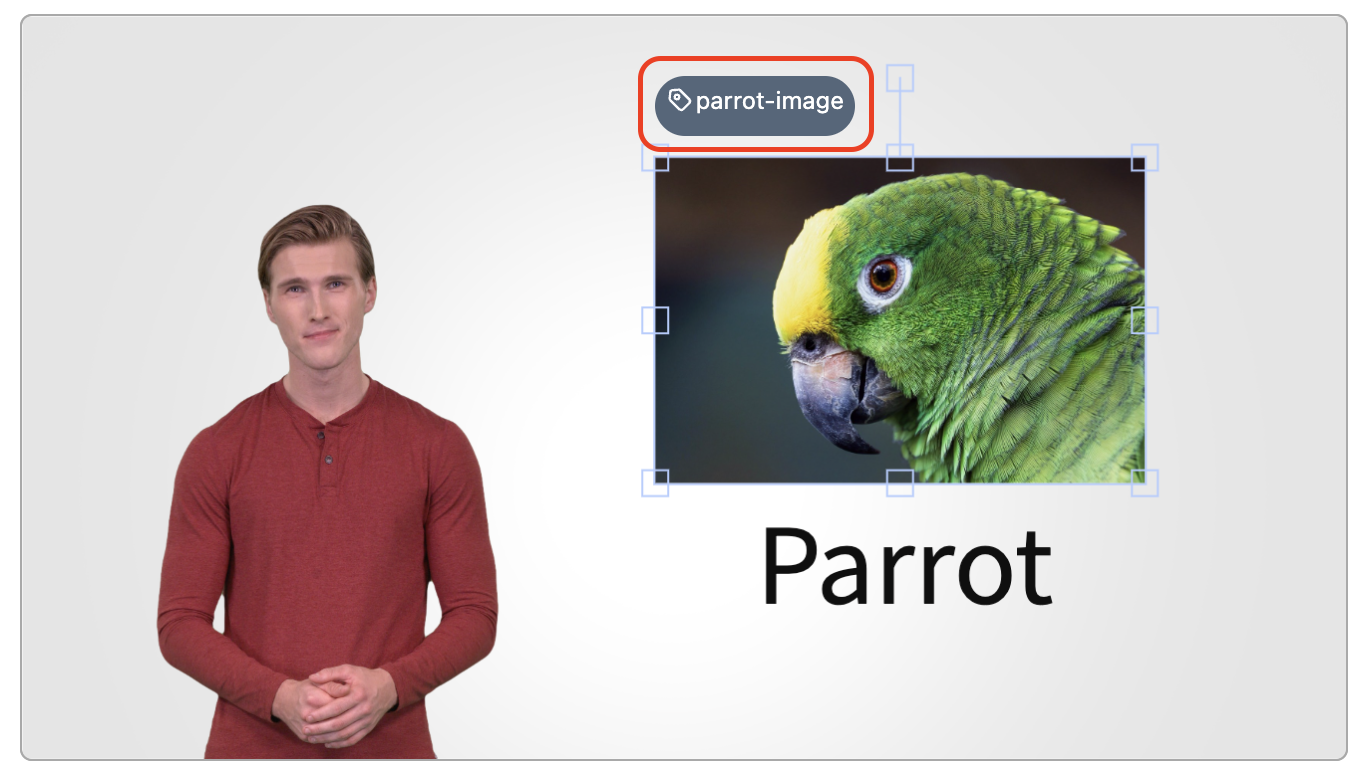
Additionally, to make it easier to find the image and text elements to be modified, tags are attached to each element.
1.1. Creating Scenes
| First Scene | Second Scene |
|---|---|
 |  |
Create a project consisting of two scenes. Each scene contains image and text elements. Each scene has avatar dialogues, and the second scene contains a conversation between two avatars.
1.2. Tagging

Tags are attached to the elements to be modified for easy identification. In this guide, the image is tagged with parrot-image and the text with parrot-text.
2. Setting the API Key
All API communications within AI STUDIOS V3 require authentication. The API key is used for this purpose. Set the issued API key in the token variable. If you do not have an issued key yet, you can issue it at Generate API Key.
const token = '## API key ##'
3. Setting the Project ID
Set the projectId variable to the ID of an existing project. You can find the project ID by clicking on a previously saved project on the My Studio page and entering the edit screen via the URL. For example, in app.aistudios.com/editor/abcdefg, the project ID is abcdefg.

const projectId = '## project id ##'
4. Requesting the Project Import API
Use the Project Import API to retrieve the project to be exported as a video. Use the API key and project ID set in 2. Setting the API Key and 3. Setting the Project ID steps to retrieve the project.
Request Format
| Item | Value |
|---|---|
| Endpoint | /api/odin/v3/editor/project/<project id> |
| Method | GET |
Example Code
const API_HOST = 'https://app.aistudios.com'
const GET_PROJECT_API_PATH = '/api/odin/v3/editor/project'

const project = await fetch(
  `${API_HOST}${GET_PROJECT_API_PATH}/${projectId}`,
  {
    method: 'GET',
    headers: {
      Authorization: token,
    },
  },
)
  .then((response) => response.json())
  .then((response) => {
    if (response.success == true) {
      return response.data.project
    }
  })
Common API Tips
To authenticate API usage, you must enter the API key in the request header. Specify the API key set in 2. Setting the API Key step as the value of the Authorization item in the request header. Most APIs require authorization, so do not omit the API key.
fetch('## endpoint ##', {
  headers: {
    Authorization: token,
  },
})
The response body of most APIs is composed in the same format. It mainly consists of success/failure status and result data.
The success/failure status is boolean, and the result data may vary by API.
| Item | Type | Description |
|---|---|---|
success | boolean | Success/failure status of the result - Success: true - Failure: false |
data | any | Result data |
const responseBody: {
  success: boolean
  data: any
} = await fetch('## endpoint ##')
  .then((response) => response.json())
5. Modifying Project Data
The retrieved project data contains most of the information that makes up the project. We will explain the general structure of the project data and the process of changing some elements.
Project Data Structure
The top-level fields of project mainly consist of items that affect the entire project. These include the project's name, screen orientation, and scene list.
project Fields
| Item | Type | Description |
|---|---|---|
project.name | string | Project name |
project.orientation | 'landscape' | 'portrait' | Screen orientation Changes the width/height based on 1920x1080. |
project.scenes | scene[] (json[]) | Screen composition of each scene, avatar dialogues |
project.scenes contains scene data as an array for the number of scenes. scene consists of screen components and avatar dialogues. The screen components are in scene.clips, and the avatar dialogues are in scene.scripts, both as arrays.
Screen components have a data structure called clip. The fields vary depending on the type of clip. Below are the common or main fields of clip.
clip Fields
| Item | Type | Description |
|---|---|---|
clip.type | 'image' | 'textImage' | ... | Type of clip |
clip.left | number | left value of clip(unit: px) |
clip.top | number | top value of clip(unit: px) |
clip.width | number | width value of clip(unit: px) |
clip.height | number | height value of clip(unit: px) |
clip.scaleX | number | Horizontal scale of clipThe actual width is calculated using this value and clip.width(unit: ratio value based on 1. e.g. 1.5) |
clip.scaleY | number | Vertical scale of clipThe actual height is calculated using this value and clip.width(unit: ratio value based on 1. e.g. 1.5) |
clip.tag | string | undefined | Tag specified by the user in the editor |
For detailed formats of each clip type, refer to the Clip Attributes document.
Avatar dialogues have a data structure called script. The fields of script vary depending on various conditions such as the type of avatar or voice. In this guide, we will only perform simple tasks to modify the dialogues entered in a general situation.
In the case of a single avatar, there is usually only one script in scripts, but in the case of a conversation between avatars, there are as many scripts as there are dialogues.
script Fields
| Item | Type | Description |
|---|---|---|
script.org | string | Avatar dialogue Although <p />, <span /> tags are allowed, it is recommended to input only plain text |
5.1. Replacing an Image
Replace the image in the first scene with another image. Use the tag specified in 1.2. Tagging to find the image to be replaced and replace it with a new image.
Finding the First Scene
Find the first scene in the project retrieved in 4. Requesting the Project Import API step.
const firstScene = project.scenes[0]
Finding the Image Clip
Find the image clip to be replaced in the first scene. In 1.2. Tagging step, we tagged it as parrot-image. Find the clip with the parrot-image tag.
const imageTag = 'parrot-image'
const imageClip = firstScene.clips.find((clip) => clip.tag === imageTag)
Replacing the Image
Image clips have additional fields for images besides the common fields.
Additional Fields for Image clip
| Item | Type | Description |
|---|---|---|
source_url | string | Image URL |
Enter the URL of the image to be replaced in this field.
const replacingImageUrl = '## replacing image url ##'
imageClip.resource_url = replacingImageUrl
If the size of the previous image and the new image are the same, you only need to replace the image URL. However, if the sizes are different, consider specifying the position, size, and other attributes appropriately.
imageClip.left = 15
imageClip.width = 15
imageClip.scaleX = 1.5
The image to be replaced must be in a public location and accessible externally. If the image cannot be accessed during video export, an error may occur, or the image may not be displayed in the resulting video.
- Ensure it has a public URL
- Ensure it is accessible from external networks
- Ensure it is not blocked by access permissions, etc.
5.2. Replacing Text
Replace the text in the first scene with another text.
Finding the Text Clip
Find the text clip to be replaced in the first scene. Find the clip with the parrot-text tag.
const textTag = 'parrot-text'
const textClip = firstScene.clips.find((clip) => clip.tag === textTag)
If the length of the text to be replaced is different, consider specifying the position, size, and other attributes appropriately.
You can also change the fontSize.
The unit of fontSize is pt.
However, note that the common unit of the project is px.
The ratio between pt and px is 3:4.
const changingFontSizePx = 10
const changingFontSizePt = changingFontSizePx * 3 / 4
textClip.fontSize = changingFontSizePt
5.3. Replacing Scripts
Change the dialogue of the first scene and the second dialogue of the second scene. Dialogues are entered as arrays in each scene. Even in the case of narration-type dialogues with a single avatar, the dialogues are entered as arrays, and in this case, there is only one item in the array. In the case of conversation-type dialogues with two avatars, there are as many dialogues as there are conversations.
Replacing the First Scene Dialogue
const replacingFirstSceneScript = '## replacing first scene script ##'
const firstSceneScript = firstScene.scripts[0]
firstSceneScript.org = replacingFirstSceneScript
Replacing the Second Dialogue of the Second Scene
const secondScene = project.scenes[1]

const replacingSecondSceneScript = '## replacing second scene script ##'
const secondSceneScript = secondScene.scripts[1]
//                                            ^ second script
secondSceneScript.org = replacingSecondSceneScript
6. Requesting the Project Export API
Request the Project Export API with the modified scene data. 'Export' means a synthesis request to generate a video, and you can check the full range of data types that can be sent when requesting the Project Export API here.
Request Format
| Item | Value |
|---|---|
| Endpoint | /api/odin/v3/editor/project |
| Method | POST |
| Body | Partial<project> (json) |
Example Code
const GENERATE_PROJECT_API_PATH = '/api/odin/v3/editor/project'

const stringifiedProject = JSON.stringify({
  name: project.name,
  orientation: project.orientation,
  scenes: project.scenes,
})
const generatedProjectId = await fetch(
 `${API_HOST}${GENERATE_PROJECT_API_PATH}`
  {
    method: 'POST',
    headers: {
      Authorization: token,
      'Content-Type': 'application/json',
    },
    body: stringifiedProject,
  },
)
  .then((response) => response.json())
  .then((response) => {
    if (response.success === true) {
      return response.data.projectId
    }
  })
7. Checking and Completing Project Progress
The process of exporting a video takes time. The 6. Requesting the Project Export API step starts the export function. You need to check the progress of the export process to determine if it is complete.
In this guide, we will check the progress every minute to determine if it is complete.
Request Format
| Item | Value |
|---|---|
| Endpoint | /api/odin/v3/editor/progress/<project id> |
| Method | GET |
Example Code
const GET_PROGRESS_API_PATH = '/api/odin/v3/editor/progress'

const delay = async (ms = 1000 * 60) => {
  await new Promise(r => setTimeout(r, ms))
}

let isFinished = false
let videoUrl = ''

while (!isFinished) {
  const progressData = await fetch(
    `${API_HOST}${GET_PROGRESS_API_PATH}/${generatedProjectId}`,
    {
      method: 'GET',
      headers: {
        Authorization: token,
      },
    },
  )
    .then((response) => response.json())
    .then((response) => {
      if (response.success === true) {
        return response.data
      }
    })

  if (progressData.progress < 100) {
    await delay()
  }
  else {
    videoUrl = progressData.downloadUrl
    isFinished = true
  }
}
Full Code
const API_HOST = 'https://app.aistudios.com'
const GET_PROJECT_API_PATH = '/api/odin/v3/editor/project'
const GENERATE_PROJECT_API_PATH = '/api/odin/v3/editor/project'
const GET_PROGRESS_API_PATH = '/api/odin/v3/editor/progress'

const token = '## API key ##'
const projectId = '## project id ##'
const replacingImageUrl = '## replacing image url ##'
const replacingTextSentence = '## replacing text sentence ##'
const replacingFirstSceneScript = '## replacing first scene script ##'
const replacingSecondSceneScript = '## replacing second scene script ##'

const delay = async (ms = 1000 * 60) => {
  await new Promise(r => setTimeout(r, ms))
}

const main = async () => {
  const project = await fetch(
    `${API_HOST}${GET_PROJECT_API_PATH}/${projectId}`,
    {
      method: 'GET',
      headers: {
        Authorization: token,
      },
    },
  )
    .then((response) => response.json())
    .then((response) => {
      if (response.success == true) {
        return response.data.project
      }
    })

  const imageTag = 'parrot-image'
  const imageClip = firstScene.clips.find((clip) => clip.tag === imageTag)

  imageClip.resource_url = replacingImageUrl

  const textTag = 'parrot-text'
  const textClip = firstScene.clips.find((clip) => clip.tag === textTag)

  textClip.text = replacingTextSentence

  const firstSceneScript = firstScene.scripts[0]
  firstSceneScript.org = replacingFirstSceneScript

  const secondScene = project.scenes[1]

  const secondSceneScript = secondScene.scripts[1]
  secondSceneScript.org = replacingSecondSceneScript

  const stringifiedProject = JSON.stringify({
    name: project.name,
    orientation: project.orientation,
    scenes: project.scenes,
  })
  const generatedProjectId = await fetch(
    `${API_HOST}${GENERATE_PROJECT_API_PATH}`,
    {
      method: 'POST',
      headers: {
        Authorization: token,
        'Content-Type': 'application/json',
      },
      body: stringifiedProject,
    },
  )
    .then((response) => response.json())
    .then((response) => {
      if (response.success === true) {
        return response.data.projectId
      }
    })

  let isFinished = false
  let videoUrl = ''

  while (!isFinished) {
    const progressData = await fetch(
      `${API_HOST}${GET_PROGRESS_API_PATH}/${generatedProjectId}`,
      {
        method: 'GET',
        headers: {
          Authorization: token,
        },
      },
    )
      .then((response) => response.json())
      .then((response) => {
        if (response.success === true) {
          return response.data
        }
      })

    if (progressData.progress < 100) {
      await delay()
    }
    else {
      videoUrl = progressData.downloadUrl
      isFinished = true
    }
  }

  console.log(videoUrl)
}

main()