Overview
Demo web page
The demo web page is a web page that allows you to experience functions using the Web(js) AI Human SDK, and when you press the DEMO button(Link), the following menu appears at the top right of the web page.

Demo web page menu
Each menu is as follows.
- QuickStart : AIPlayer QuickStart
- SDK Demo : functionalities of AIPlayer
- STT Demo : AIPlayer + PlayChat
Sample Project
The sample covered in this document is an example using the AI Human SDK, which provides a demonstration of its functions by implementing them in the Sample Project. Through this, it is possible to examine in detail how SDK can be actually used and operated.
Configuration
| Filename | Division | Description |
|---|---|---|
generateJWT.js | Server | generate client token javascript |
quickStart.html | Client | quick start html |
quickStart.js | Client | quick start javascript |
demo1.html | Client | sdk demo html |
demo1.js | Client | sdk demo javascript |
demo1.css | Client | sdk demo css |
demo2.html | Client | stt demo css |
demo2.js | Client | stt demo css |
demo2.css | Client | stt demo css |
How to Run
The sample project environment provides two types: node-express and nextjs. After accessing SDK-Project(link), you can download the sample project by clicking the 'Sample' button below.
Configuration
When you extract the downloaded files, you will have the following file structure. Here's how each project works.
| Folder name | Description |
|---|---|
node-express | sample project 1 |
nextjs | sample project 2 |
Run using nextjs
Use nextjs to quickly create projects (SDK DEMO versions) using the AI Human SDK.
1. Prepare appId and userKey through the Project Setup process.
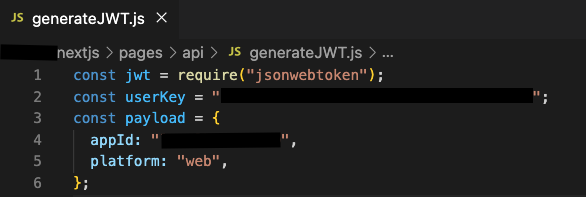
2. Modify the /nextjs/pages/api/generateJWT.js file.
- Input the appId in the 4th line.
- Input the userKey in the 2nd line.
3. Run the server from the /nextjs directory location using the command below.
$ cd nextjs
$ npm install
$ npm run dev
4. From a Chrome browser, access http://localhost:3000.
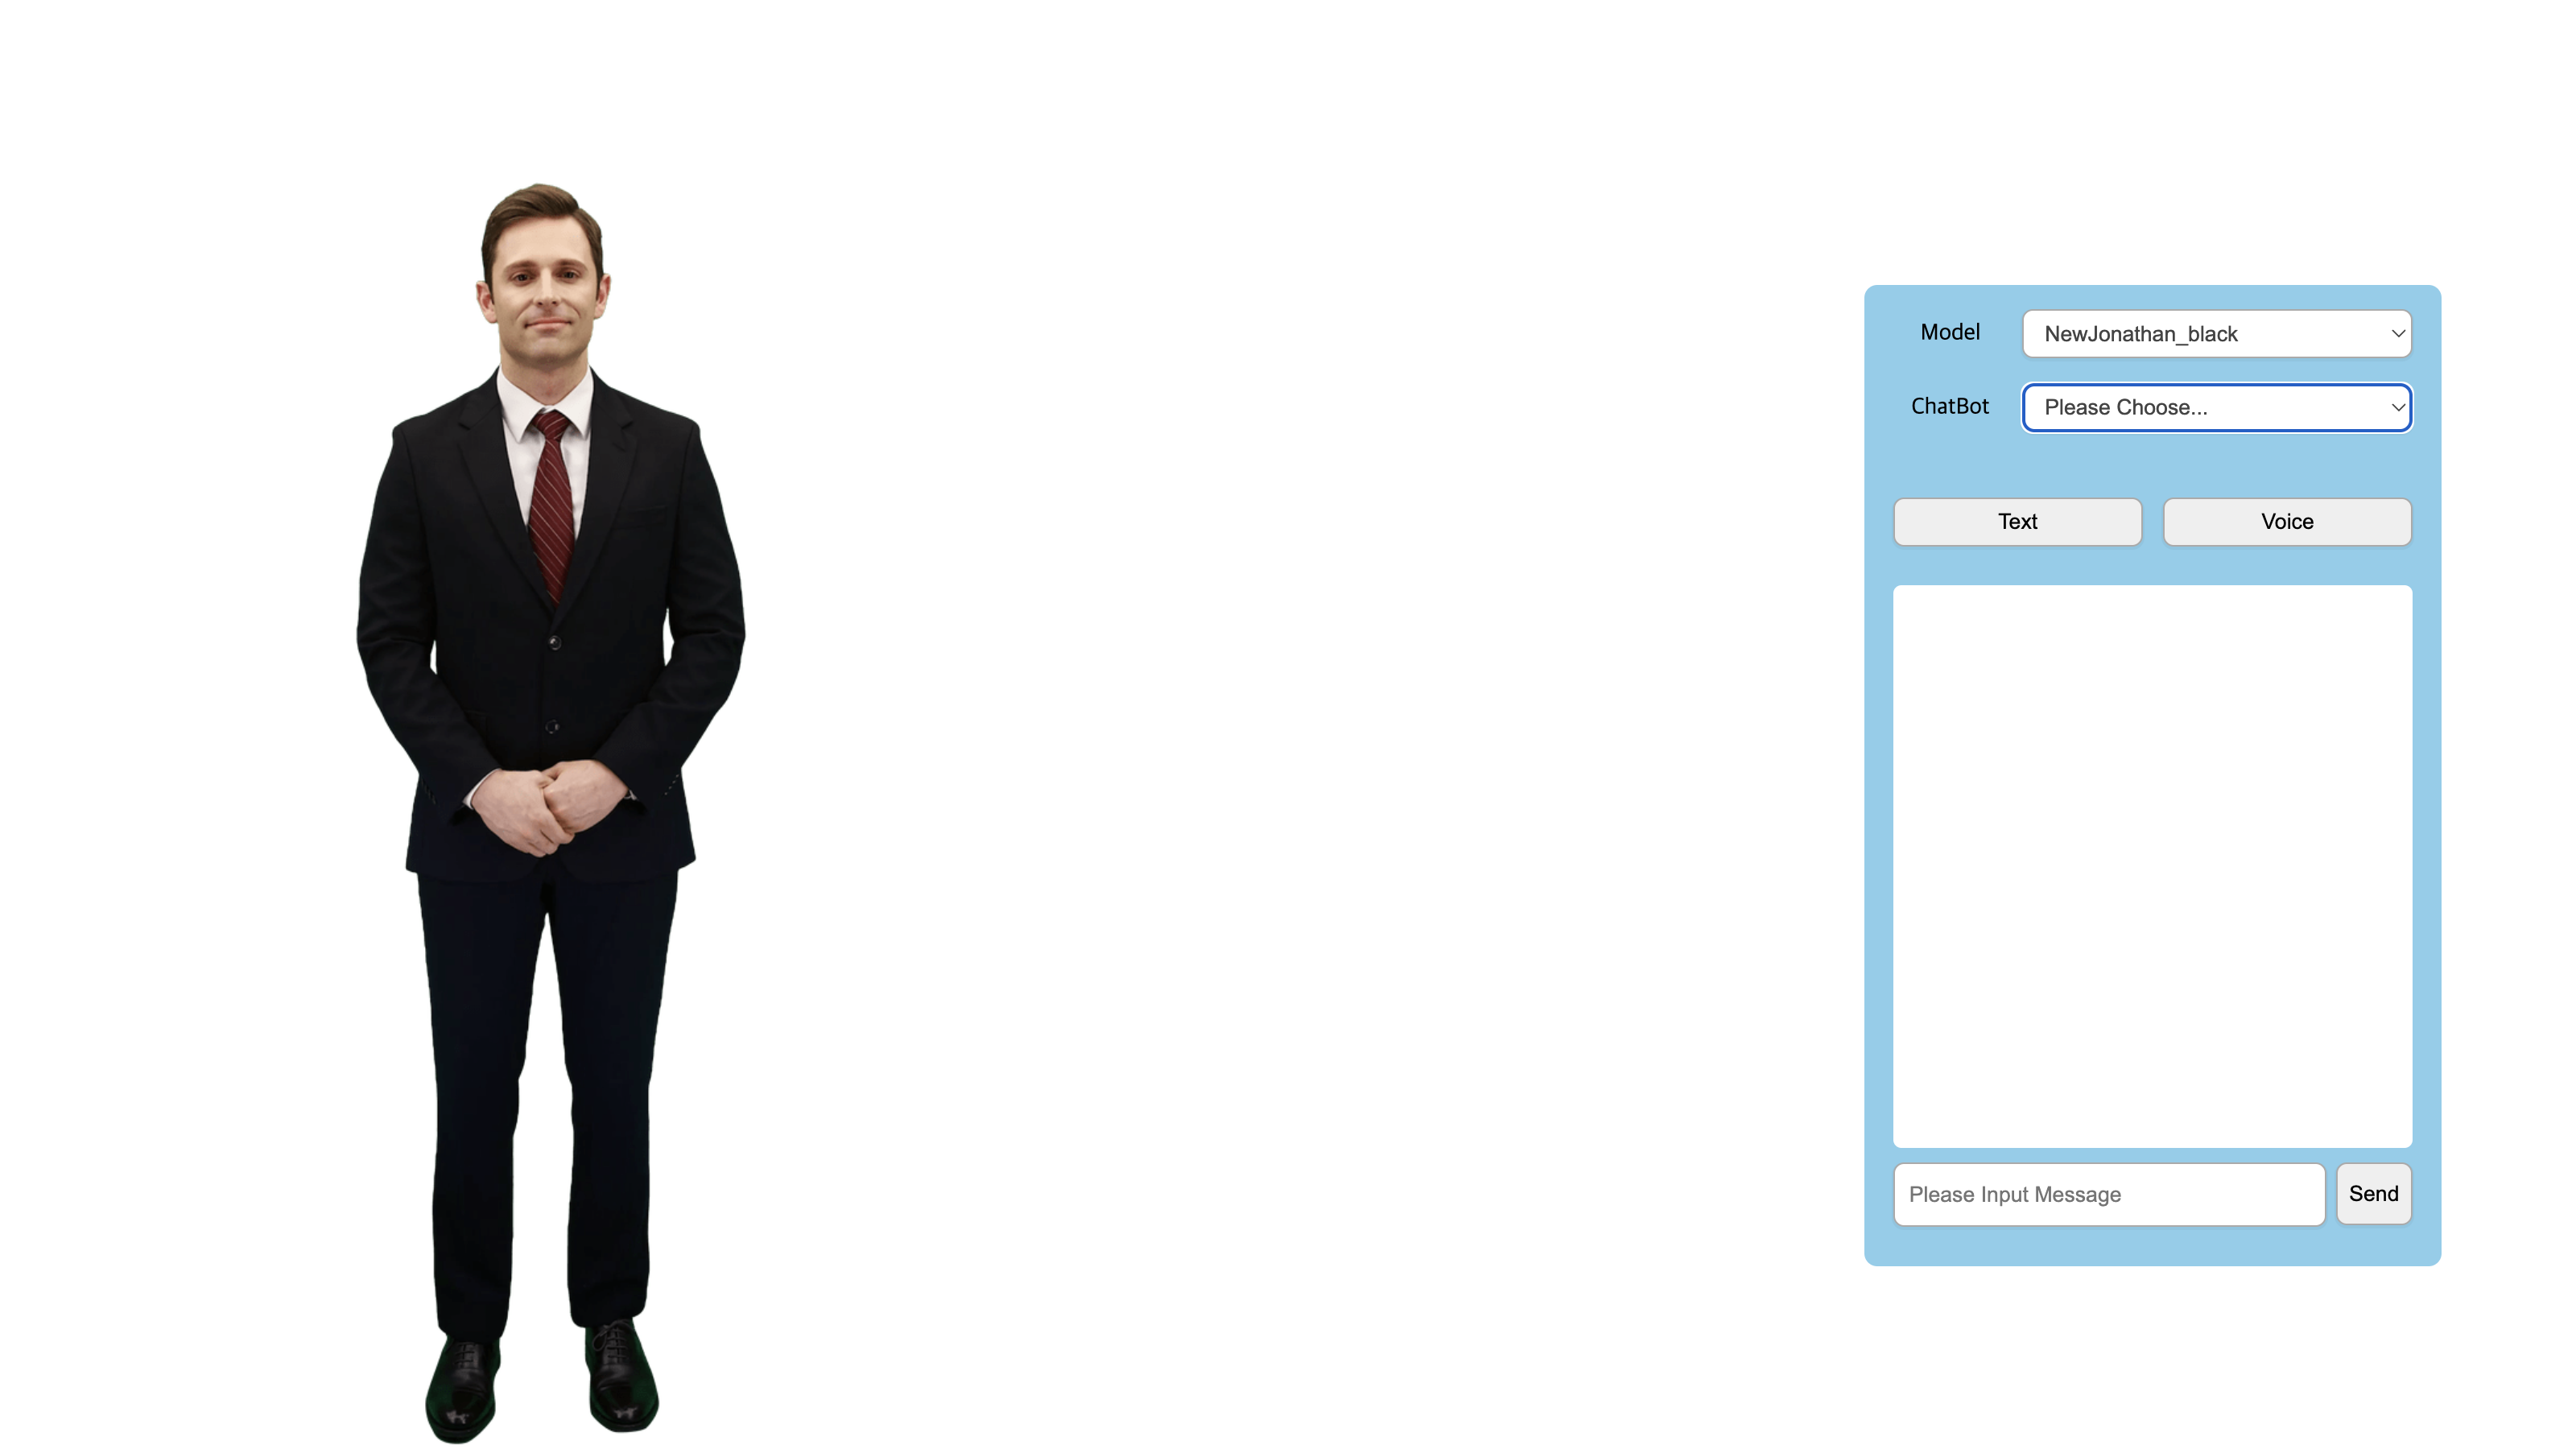
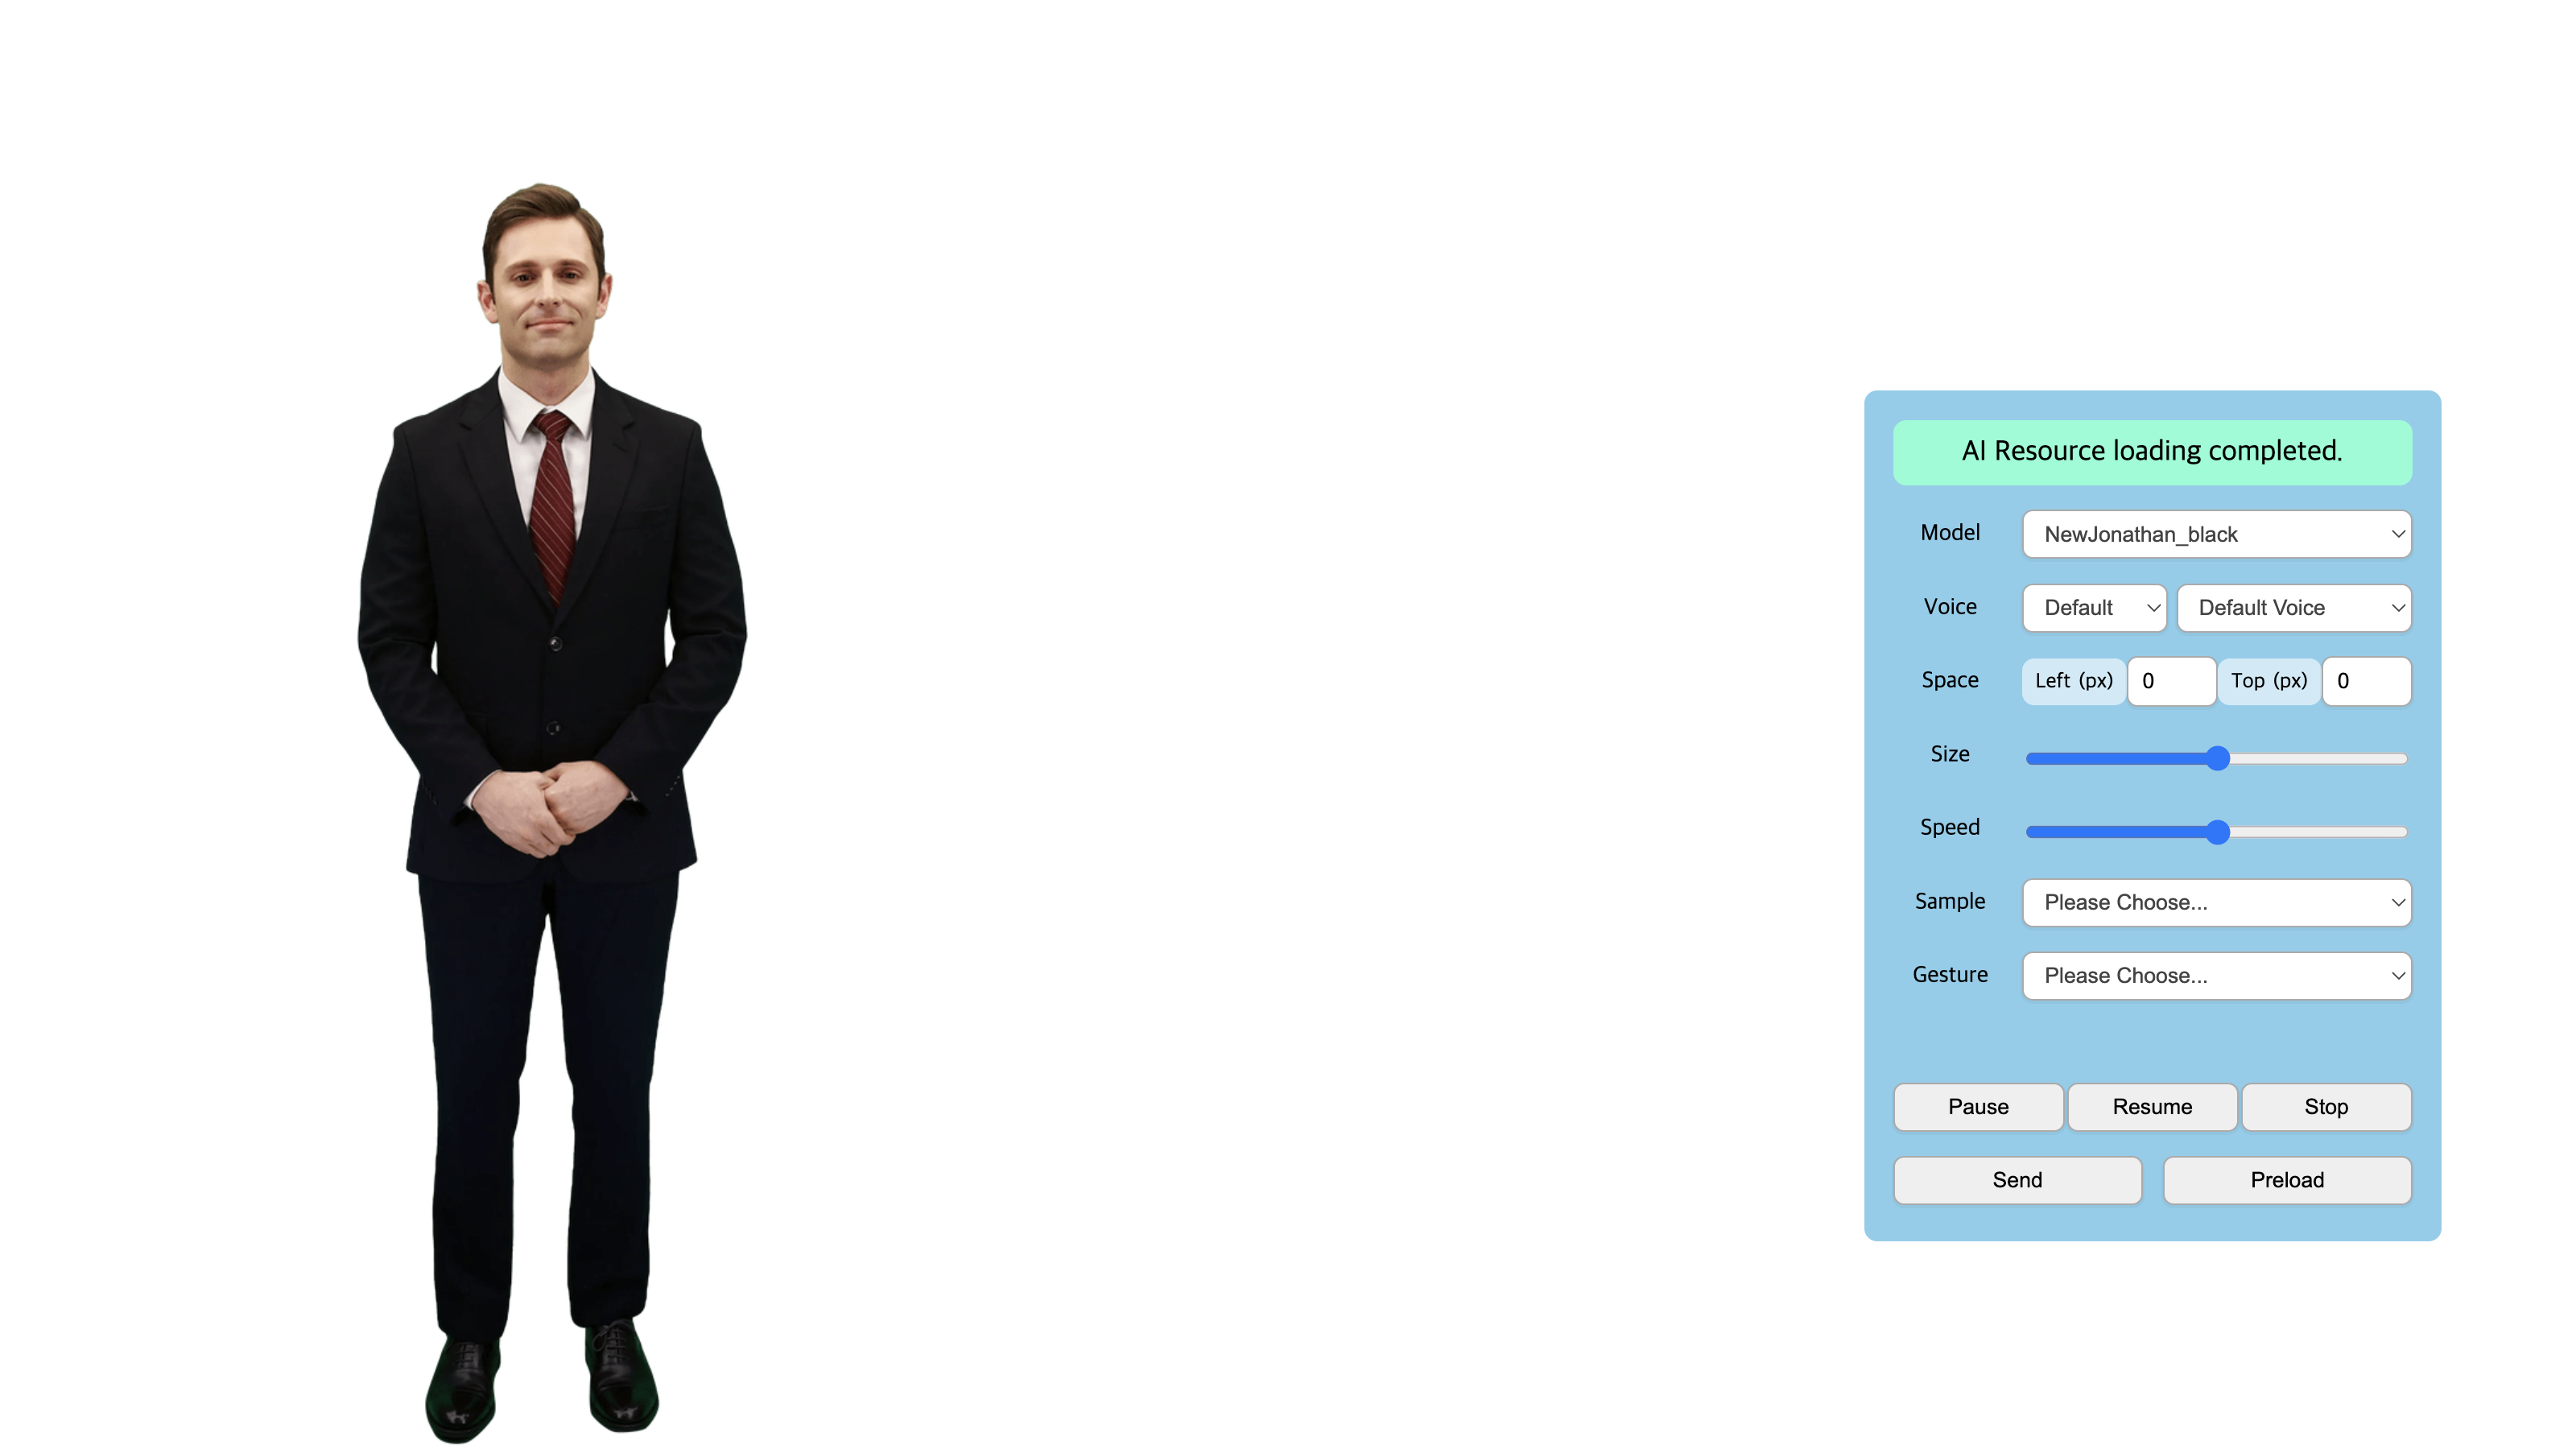
5. Normal operation screenshot
The following version of SDK DEMO will be executed.
Run using node-express
1. Prepare appId and userKey through the Project Setup process.
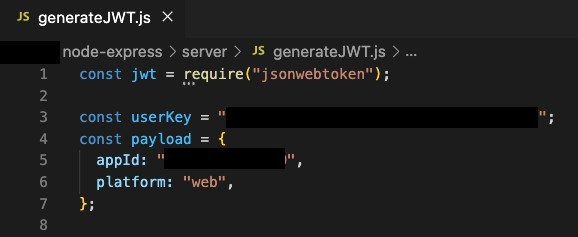
2. Modify the /node-express/server/generateJWT.js file.
- Input the appId in the 5th line.
- Input the userKey in the 3rd line.
3. Run the server from the /node-express/server directory location using the command below.
$ cd node-express/server
$ npm install
$ npm start
4. Open the /node-express/client/quickStart.html file with a Chrome browser.
5. Normal operation screenshot
If quickStart.html, demo1.html, and demo2.html operate normally, it is as shown in the screen shot below.