with Playchat & STT
- AIPlayerWithPlayChatDemo.java
This chapter presents a Conversational AI Human implementation approach that integrates Google STT or MS Azure STT with PlayChat.
PlayChat is DeepBrain AI's ChatBot solution.
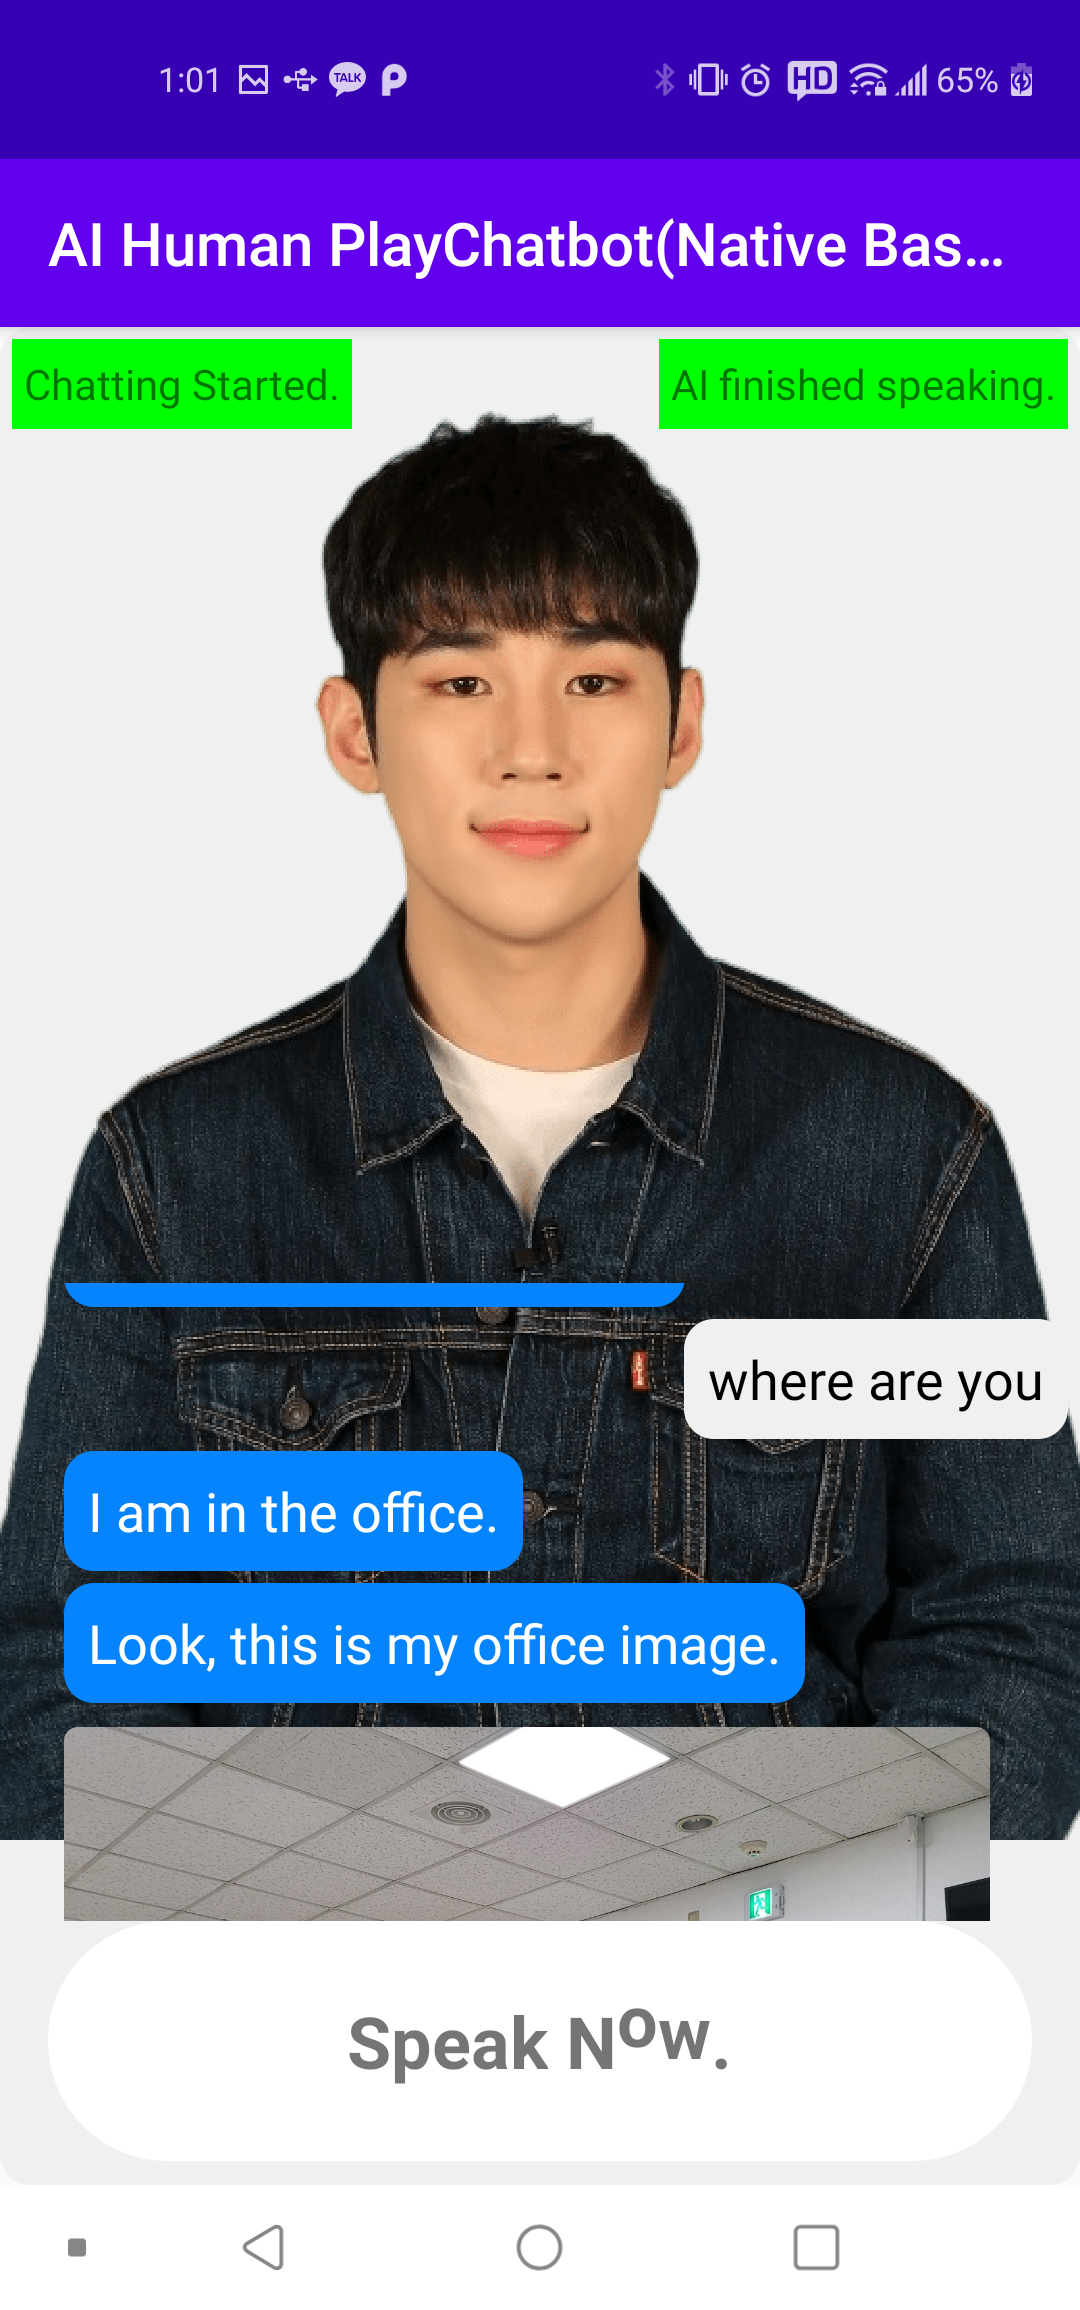
AI Human + PlayChat + STT is a demo of an interactive AI service. Basically, it is similar to AIHuman + DialogFlow, but instead of typing in the keyboard, users can have a voice conversation with the AI. AI greets("Hello long time no see.") you when you enter the screen.
After the greeting, if a voice input signal Speak Now appears below , say where are you. The AI understands the sentence and responds with an appropriate answer. Currently, the chatbot has limited speech sets, so it can only answer a few questions. If the chatbot is more advanced, it can be applied to a variety of situations such as ordering at a restaurant or making a reservation. In addition, the chatbot can also display images with information on the side in addition to text.(Chatbot server should be implemented for this.)
1. Set up the AI and UI.
@Override
protected void onCreate(@Nullable Bundle savedInstanceState) {
    super.onCreate(savedInstanceState);
    binding = AiplayerMbPlaychatbotSttDemoBinding.inflate(getLayoutInflater());
    setContentView(binding.getRoot());

    //...
    AIModelInfoManager.getAIList((aiError, resp) -> {
            /* resp{
                "succeed":true,
                "ai":[{"aiName":"vida","aiDisplayName":"Vida","language":"en"},
                {"aiName":"bret","aiDisplayName":"Bret","language":"en"},
                {"aiName":"danny","aiDisplayName":"Danny","language":"en"},
                {"aiName":"samh","aiDisplayName":"Samh","language":"en"},
                {"aiName":"kang","aiDisplayName":"Kang","language":"ko"}]}
             */

            if (aiError == null) {
                initAIChatbotController();
            } else {
                Log.d(TAG, "onFinishedWithList: getAIList error" + aiError);
            }
        });
}
2. Initialize Chatbot with Speech Recongnition.
Initialize PlayChat with a voice recognition function (STT). (AI is set as the default AI)
First, create a chatbot with the ChatbotFactory's static method (MBPlayChatbot.newMBChatbot(,)) and then call the init( , ) method. Then you can call STT-related startRecognize() and stopRecognize() methods along with the existing chatbot methods (send(,), etc.).
Set up Google for STT
Create stt instance with GoogleSTTV2 class(sample provided). This class which implements ISTT can start and stop speech recognition using 'startRecognize(), stopRecognize()' methods. You can get the result after setting up language and callback.
Set up MS Azure for STT
You can use 'MS azure Speech to Text'(sample provided) beside google STT. To use azure, go to the MS's website(https://portal.azure.com/), create STT resource and get subscription key and region like sample below.
3. Create Callback.
Create chatbot callback and call the init(,) method.
The chatbot callback (iChatbotCallback) is a callback that notifies the status change of the chatbot, reports error and messages, etc. Create an instance with the new operator and call it by putting it in the chatbot.init(,) method together with the ChatbotSettings instance as shown below. When ChatbotState.SESSION_INITIALIZED is returned in the onChatbotStateChanged method, it is ready and you can send and receive messages to the Chatbot service. The voice recognition service is now ready.
private void resetChatbotWithSTT(String sttType) {
        //set chatbot
        String chatUrl = null; //change if need
        String chatbotId = botId; //change if need
        if (chatbot != null) {
            chatbot.release();
            chatbot = null;
        }
        chatbot = MBPlayChatbot.newMBChatbot(chatUrl, chatbotId);
        chatbot.init(new ChatbotSettings(null, IChatbot.ChatbotType.NATIVE_MB_PLAYCHAT), iChatbotListener);

        //set stt
        this.sttType = sttType;
        if (stt != null) {
            stt.release();
            stt = null;
        }

        System.gc();

        if (getString(R.string.google_stt).equals(this.sttType)) {
            //getLifecycle().addObserver(gglSTT);
            this.stt = new GoogleSTTV2(this, "en-US", iSTTListener);
        } else { //ms stt
            stt = new MSAzureSTT(this, "your_subscription",
                    "your_region", "en-US", MSAzureSTT.RECOGNIZE_MODE.ONCE, iSTTListener);
        }
    }

/**
 * Chatbot(Playchat)'s callback
 */
 private IChatbotCallback iChatbotCallback = new IChatbotCallback() {

 /**
 * @param state.
 */
 @Override
 public void onChatbotStateChanged(ChatbotState state) {
    switch (state.state) {
    //...
        case ChatbotState.SESSION_INITIALIZED:
        aiChatbotCtlr.setChatbotReady(true);
        binding.chatbotStateTxt.setText("Chatbot loading completed");
        binding.chatbotStateTxt.setBackgroundColor(Color.GREEN);
        break;
        //...
};
Get started with speech recognition
You can turn on the voice recognition by calling startRecognize() method directly as shown below. To turn off voice recognition, call stopRecognize(), and each call will receive a response to callback.
In the callback signal of speech recognition, STTState.START_RECOGNIZING will be returned from onChatbotStateChanged when startRecognize() is called, and STTState.STOP_RECOGNIZING when stopRecognize() is called. In addition, there are two more callback values:
- STTState.NEW_SPEECH_POSTED : Called when the recognized word is delivered to the chatbot. For example, it comes after when the user says "Hello. Good morning."
- STTState.NEW_SPEECH_RECOGNIZED : This comes in when the recognized word is updated in the middle of recognition. For example, if the user said "Hello. Good morning", it would show all recognitions like "hello", "hello good morning" or any combination of those. This can be used to show the user that STT is responding.
//turn on
stt.startRecognize(0);

//turn off
stt.stopRecognize();

/**
  * ISTT callback
  */
    private final ISTTCallback iSTTListener = new ISTTCallback() {

        @Override
        public void onSTTStateChanged(STTState state) {
            Log.d(TAG, "onSTTStateChanged: " + state.state + " " + state.data);
            switch (state.state) {
                case STTState.START_RECOGNIZING:
                    binding.chatState.setText(getString(R.string.speak_now));
                    binding.chatState.setVisibility(View.VISIBLE);
                    binding.sttRestartBtn.setVisibility(View.GONE);
                    break;
                case STTState.STOP_RECOGNIZING:
                    binding.chatState.setStaticText("");
                    binding.chatState.setVisibility(View.INVISIBLE);
                    break;
                case STTState.NEW_SPEECH_RECOGNIZED:
                    binding.chatState.setStaticText(state.data.optString(Constants.KEY_SPEECH));
                    break;
                case STTState.NEW_FINAL_SPEECH:
                    aiChatbotCtlr.sendUserInputToChatbot(state.data.optString(Constants.KEY_SPEECH));
                    break;
            }
        }

        @Override
        public void onSTTError(STTError error) {
            Log.d(TAG, "onSTTError:" + error);
            Toast.makeText(AILiveWithMBPlayChatWithSTTDemo.this, error.toString(), Toast.LENGTH_SHORT).show();

            binding.chatState.setVisibility(View.GONE);
            binding.sttRestartBtn.setVisibility(View.VISIBLE);
        }
    };
4. Using AI + chatbot + voice recognition together.
Simply put, the main purpose of this sample is for conversations with AI using voice. For this, AIPlayer, chatbot, and voice recognition must work harmoniously. Therefore, we created the AIChatbotController class (aiChatbotCtlr member variable) that manages everything.
First, it is assumed that when AI and chatbot is loaded, it sends a "start"(VALUE_FUNC_NAME_START) signal to the chatbot. When the "start" signal is sent, the chatbot recognizes it and sends back a greeting message. The greeting goes into the onChatbotMessage() method of iChatbotCallback. The aiChatbotCtrl basically sends these words to the AI to speak.
@Override
public void onChattingReady() {
    binding.chatbotStateTxt.setText("chatting starts");
    aiChatbotCtlr.sendMsgToChatbotAndUpdateChatUI(VALUE_FUNC_NAME_START, null);
}

/**
 * received Chatbot's response
 * @param response
 */
@Override
public void onChatbotMessage(JSONObject response) {
    if (resp != null) {
        //...
    }
}
AIChatbotController processes the messages received from the chatbot.
When you receive a message from the chatbot (onChatbotMessage), first check its content (JSON). JSON is divided into two parts, func_name, the type of command, and args, the actual content. Command type onMessage is set as a default for func_name and it shows chatbot's response.
/**
 * onChatbotMessage
 *
 * @param resp
 */
public void onChatbotMessage(JSONObject resp) {
    if (resp != null) {
        /* example
        {"func_name":"onMessage",
         "args":
            {"kind":"Content",
             "text":"Hello,  long time no see.",
             "languages":{"en":"Hello,  long time no see."},
             "image":{"url":"http://...,"displayname":"office image.jpg"}
             "extra":{}}}
         */

        chatManager.onNewChatMessage(resp);

        //process for functions accordingly
        processChatbotMsgFunc(
                resp.optString(KEY_FUNC_NAME), resp.optJSONObject(KEY_ARGS));
    }
}

private void processChatbotMsgFunc(String fName, JSONObject args) {
    if (fName == null) {
        return;
    }

    switch (fName) {
        case VALUE_FUNC_NAME_ONMESSAGE:
            if (args != null) {
                String text = args.optString(KEY_TEXT);

                //ai speak
                sendMessageToAIAndChatbot(new String[]{text}, null);

                //ui update
                iAiWithChatbotControlListener.onChatAdded(createChatWith(args));
            }
            break;
    }
}
Data transfer format for Chatbot (PlayChat)
Mostly, the chatbot automatically transmits the content to the PlayChat server when it recognizes voice. However, there are situations when you need to manually send some message or special signal to the chatbot (this includes the "start" signal mentioned above). To send the user's message, call the chatbot's send(,) method.
boolean send(String command, JSONObject detail);
Write a server function name you want in the command, and put necessary arguments in a form of key:value. The currently set command (or func_name) is shown below.
//send
public static final String VALUE_FUNC_NAME_USERINPUT = "userInput";
public static final String VALUE_FUNC_NAME_START = "start";

//receive
public static final String VALUE_FUNC_NAME_ONMESSAGE = "onMessage";

//there is next message
public static final String VALUE_USERINPUT_NEXT = ":next";
The userInput function can accept an argument with key=text.
The start function doesn't need any arguments.
OnMessage comes with the following values. If the next value is true for the field 'extra', it means that there is a sequential message in queue.
/* example
{"func_name":"onMessage",
    "args":
    {"kind":"Content",
  "text":"Hello,  long time no see.",
  "languages":{"en":"Hello,  long time no see."},
  "image":{"url":"http://...,"displayname":"office image.jpg"}
  "extra":{next:true}}}
*/
If there is a message in queue, you can receive the following message when you send ":next" (VALUE_USERINPUT_NEXT) as an argument to userInput function.
/**
 * Call when AI finishs speaking.
 */
public void onAISpeakingEnd() {
      //if there is next message
    if (chatManager.hasNextMessage()) {
        sendUserInputToChatbot(VALUE_USERINPUT_NEXT);
    }
    //...
}