프로젝트 셋업하기
이 장에서는 android project의 appId를 이용하여, 프로젝트를 생성하고 userkey를 발급받는 과정을 알아봅니다. userkey는 AIHuman SDK의 인증에 사용됩니다.
1. 프로젝트를 Android Studio로 생성 및 설정
프로젝트 설정을 아래와 같이 할수 있습니다.(샘플이며 필수 아님.)
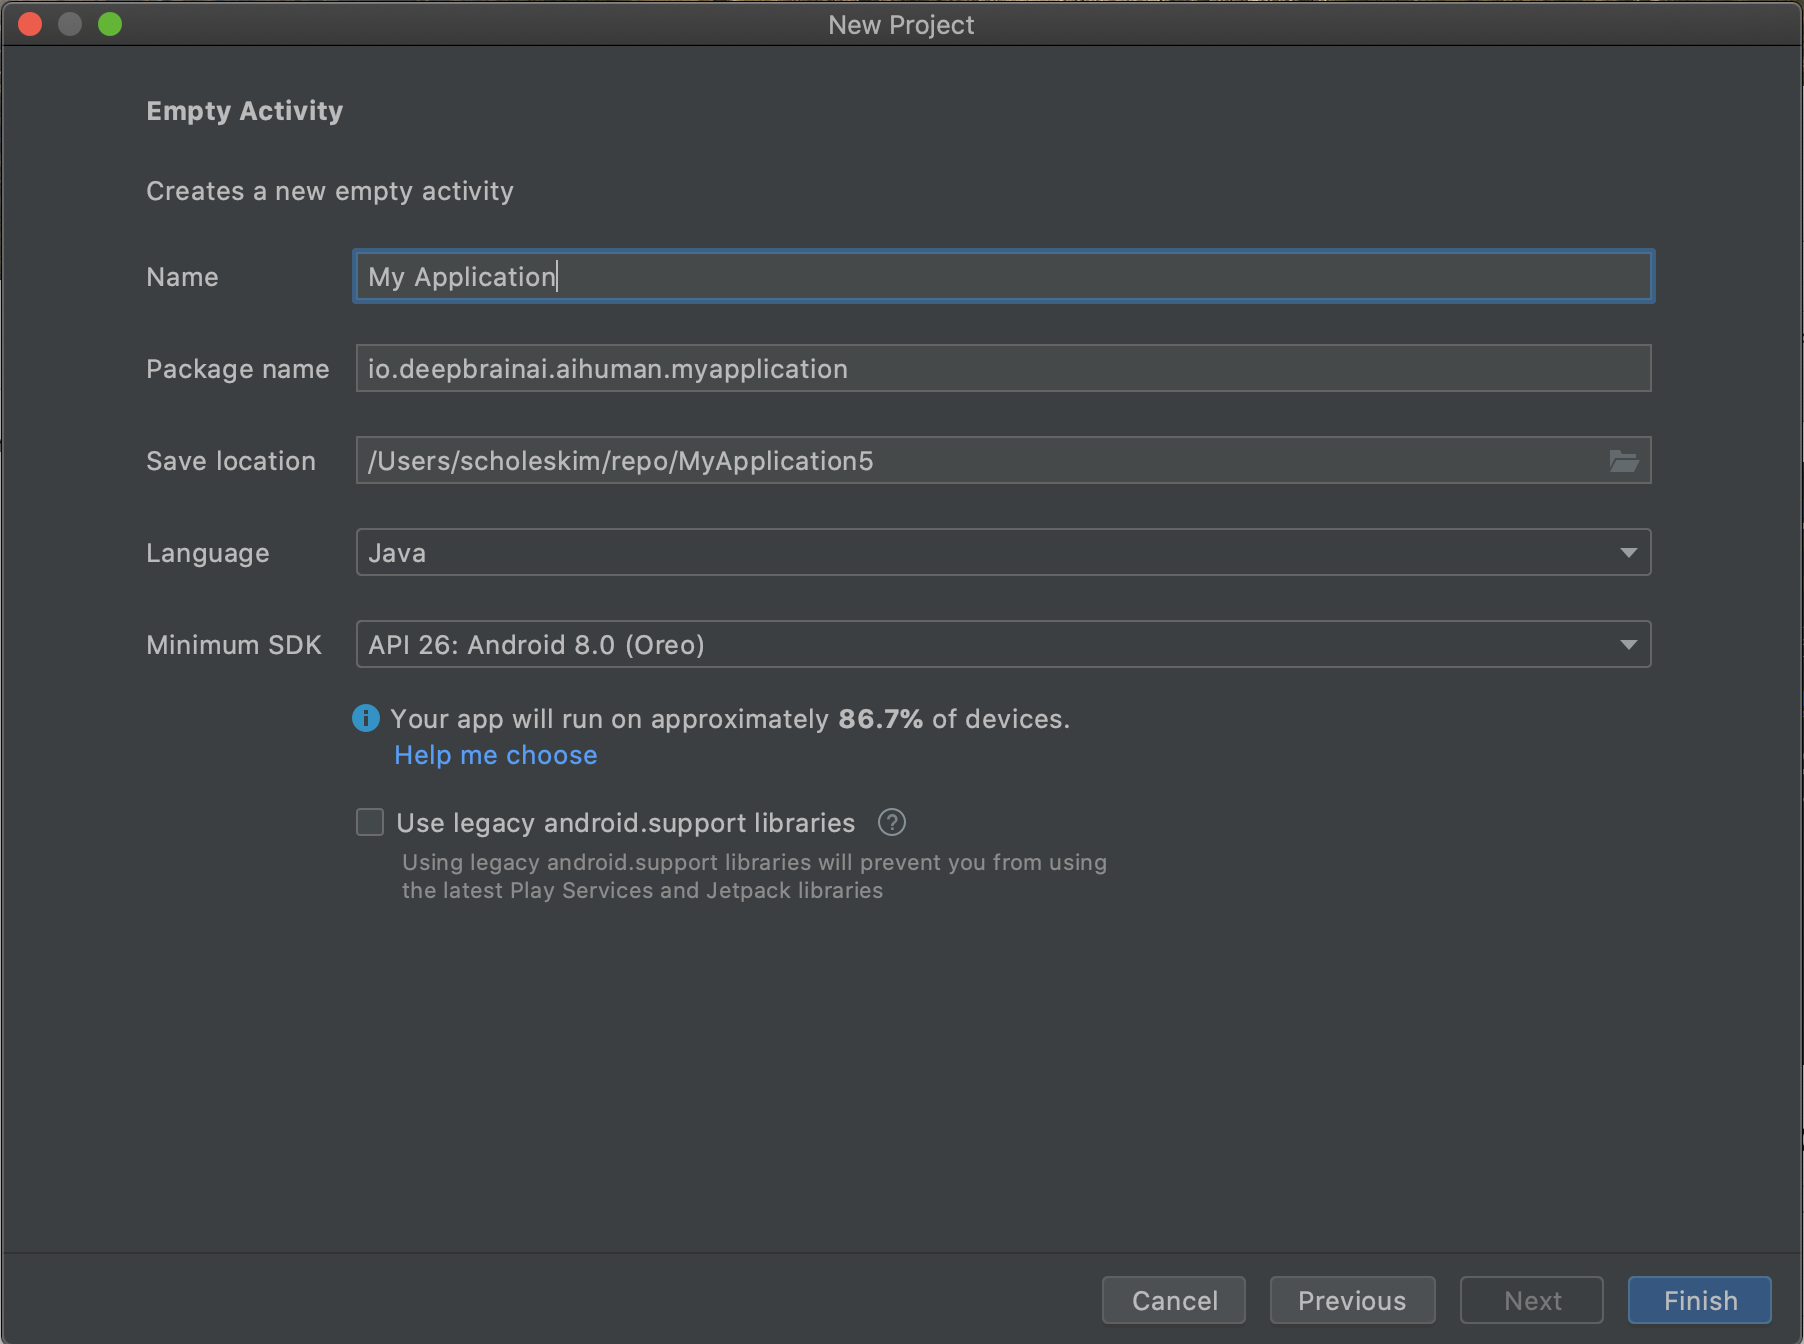
SDK 웹사이트에서 Android sample 및 SDK를 다운로드 받아 참조하세요. 아래는 샘플의 환경 설정입니다.
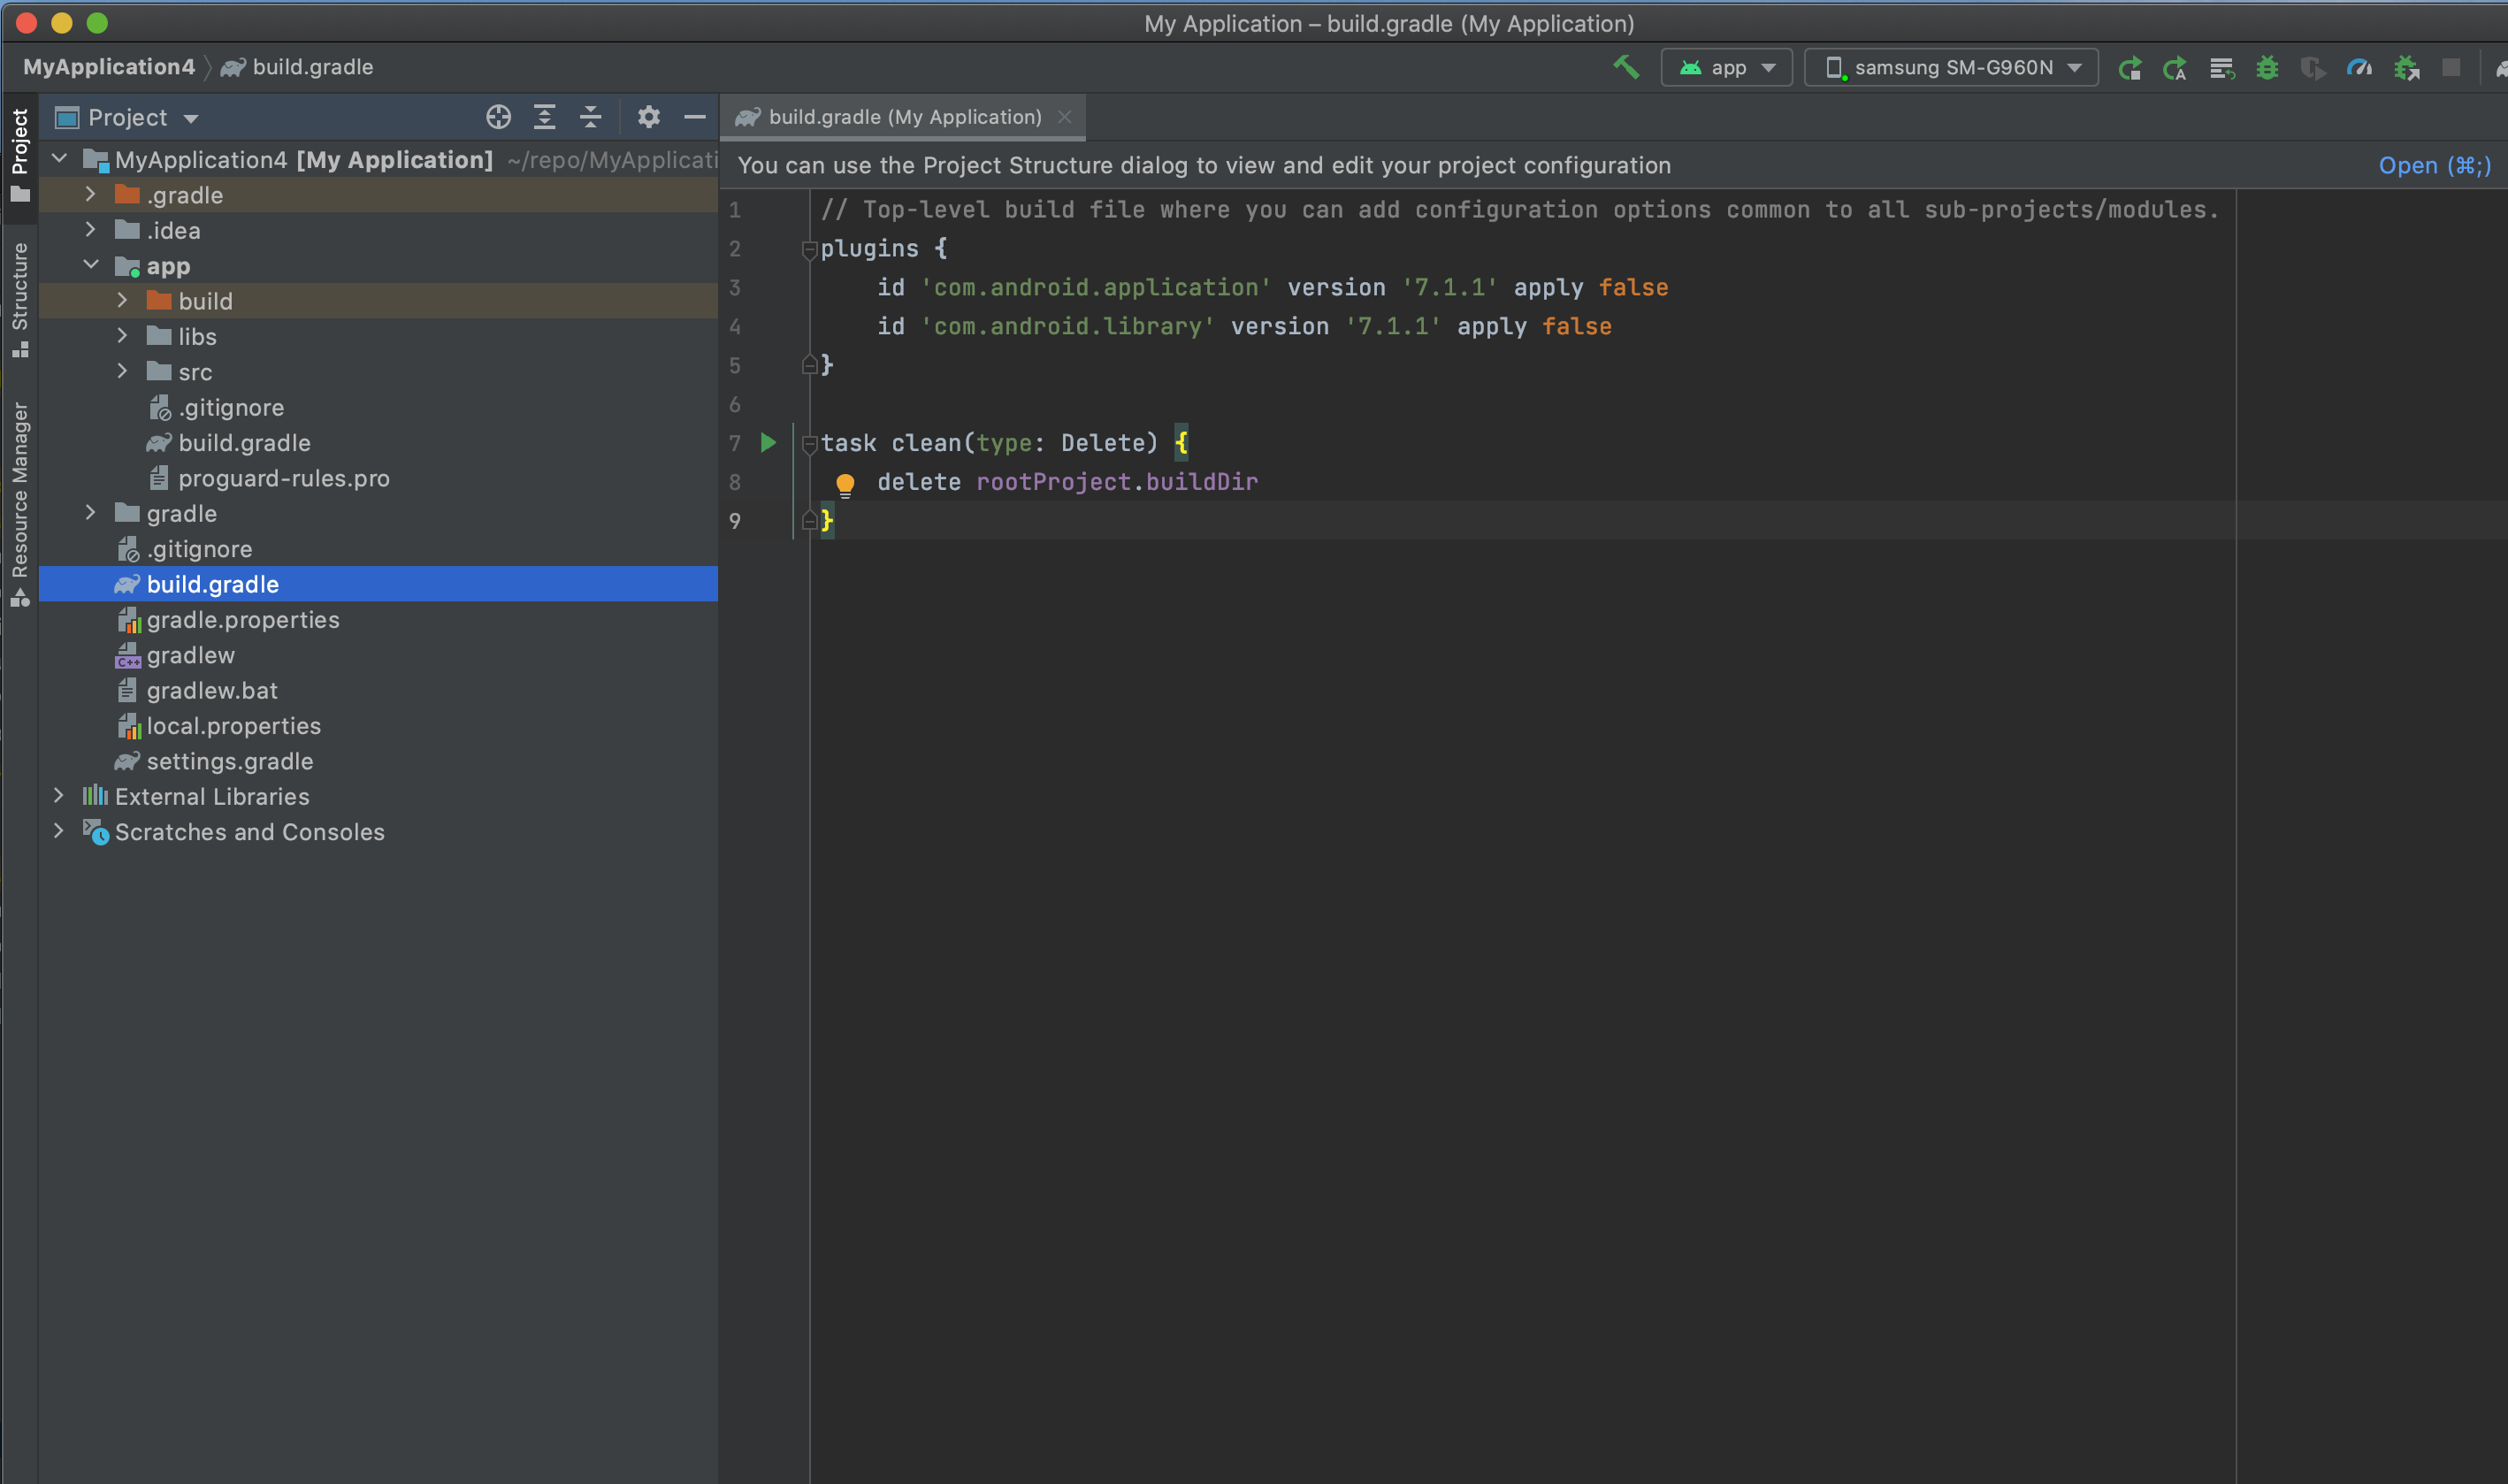
- 프로젝트 레벨 build.gradle을 설정(탑메뉴 File > Project structure)합니다.
- Android Gradle plugin version : 7.1.2, Gradle Version : 7.2
[프로젝트 레벨 build.gradle 설정]
[app 레벨 build.gradle 설정]
- compileSdkVersion 32, buildToolVersion "30.0.3", minSdkVersion 22, targetSdkVersion 32
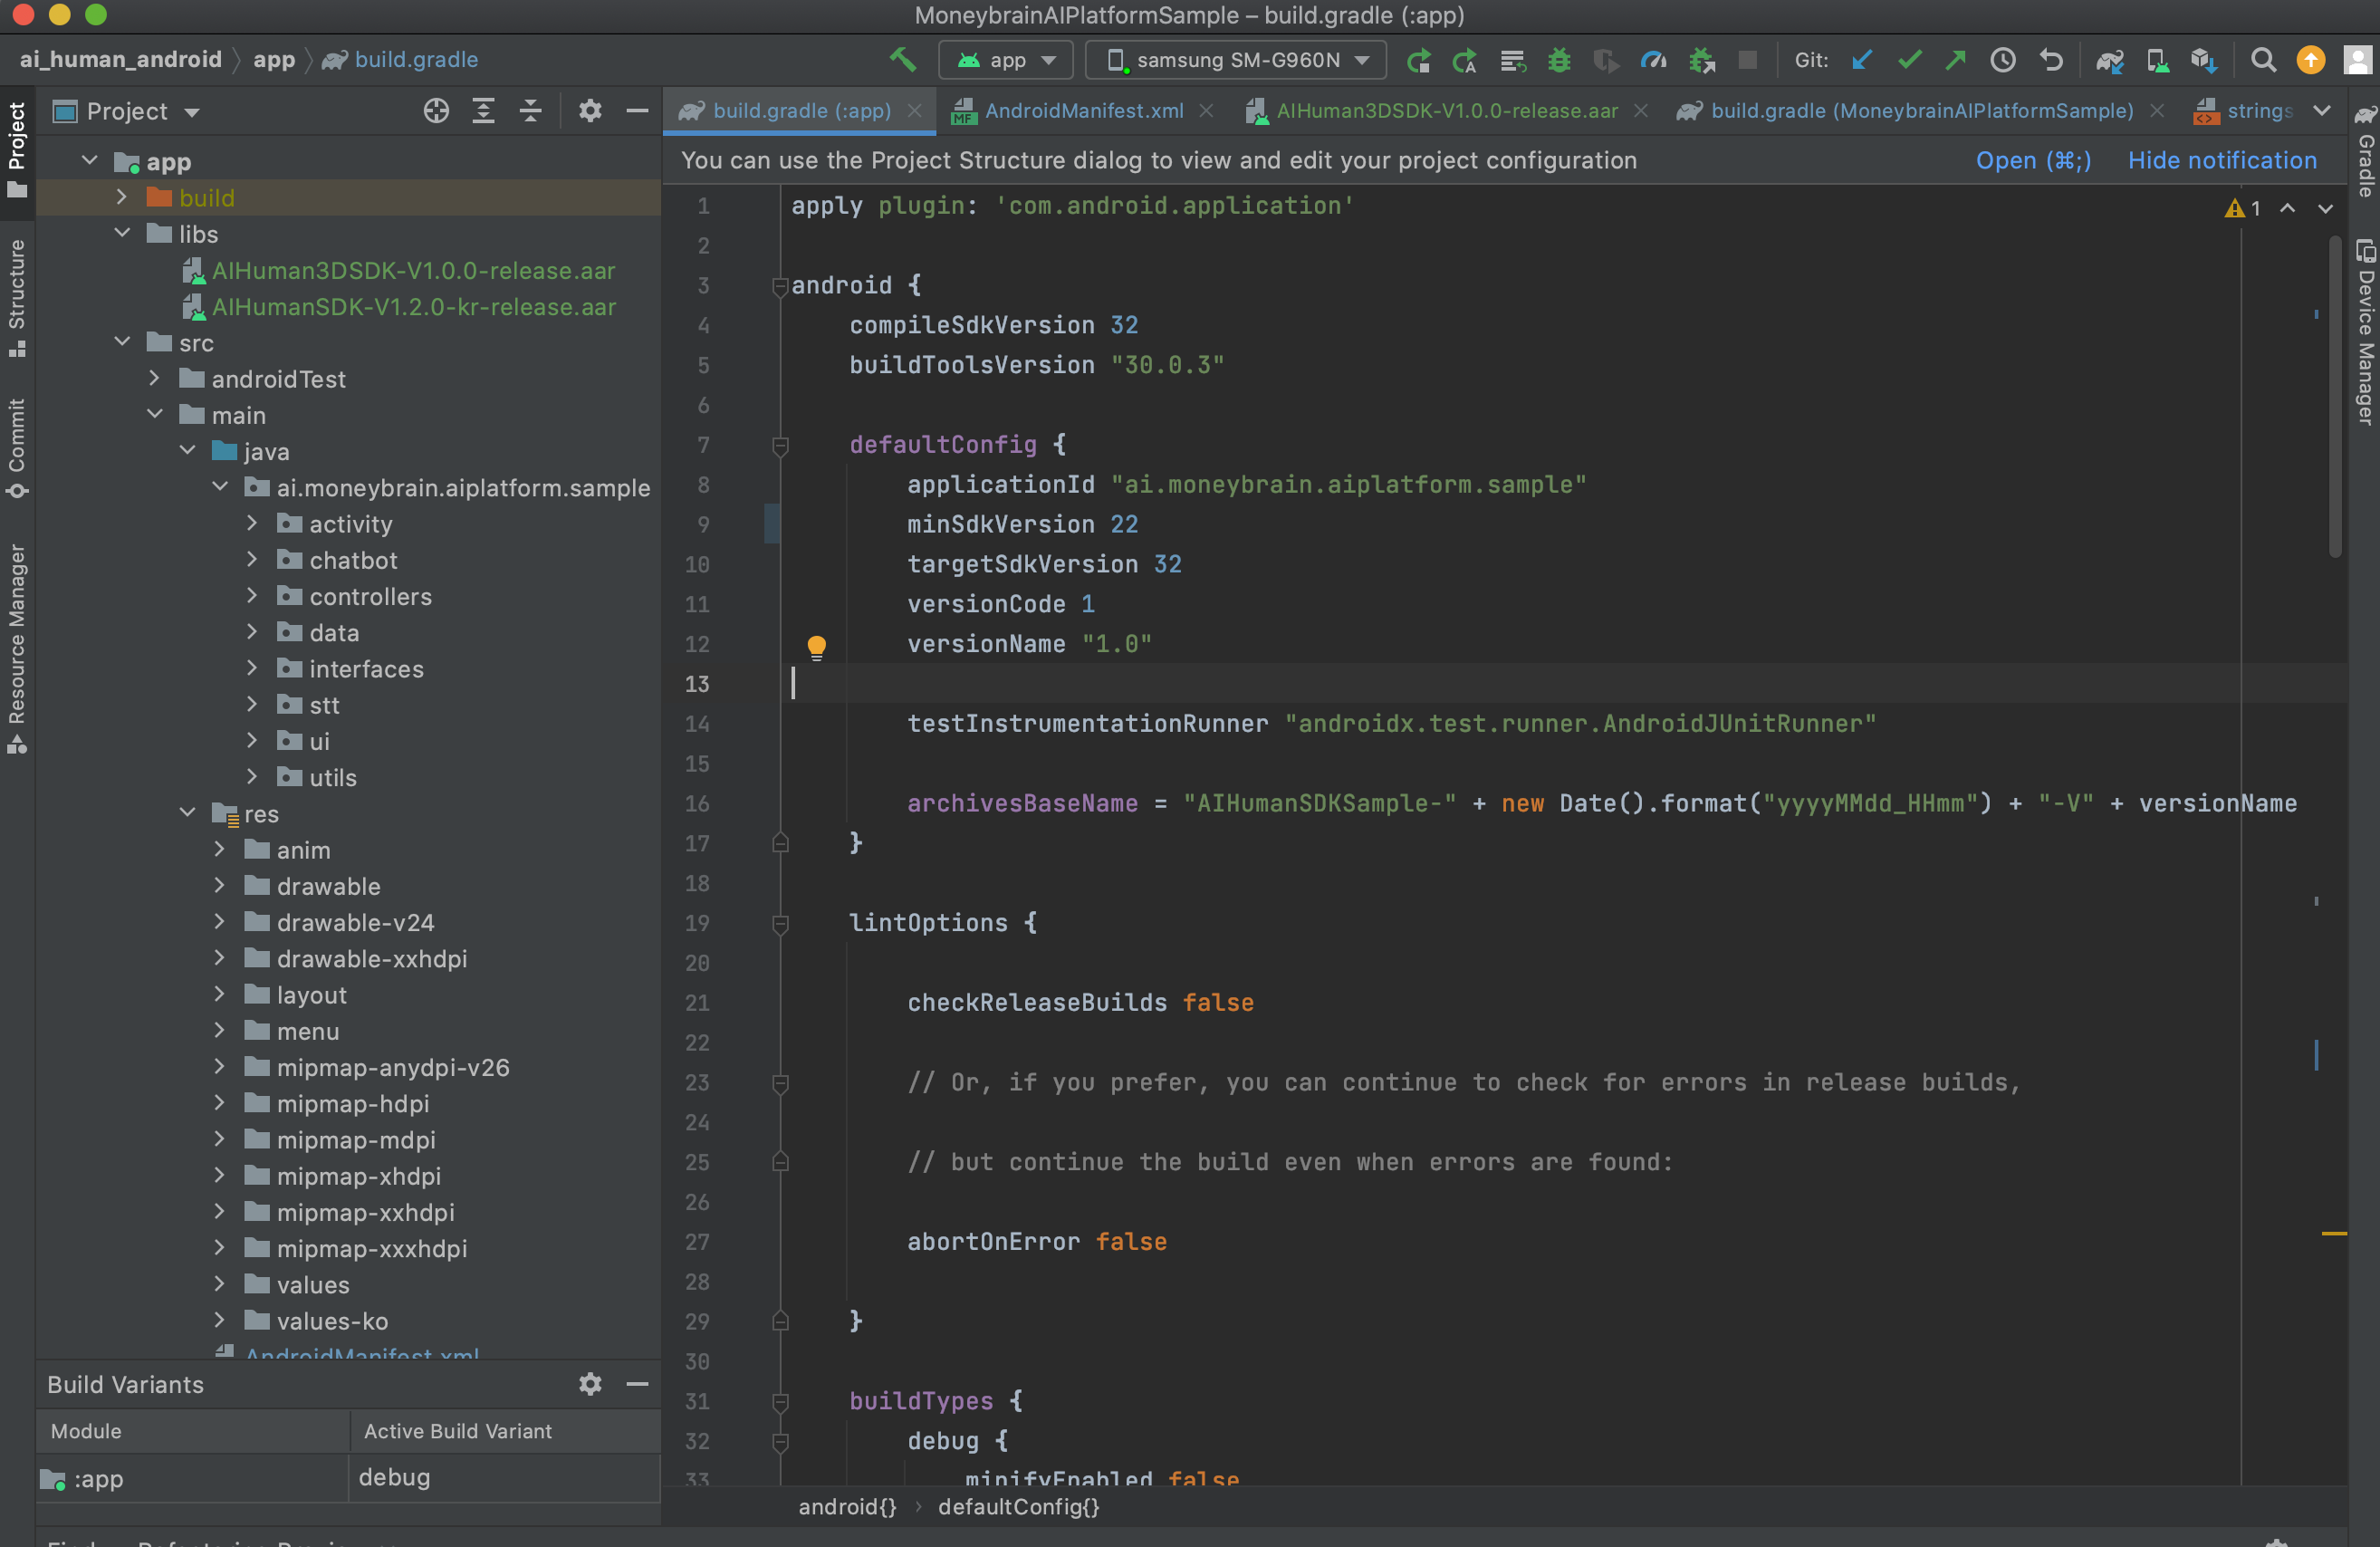
2. 사용할 프로젝트에 SDK (aar 파일) 추가하기
AI Human SDK aar 파일들(2개 AIHumanSDK, AIHuman3DSDK)을 프로젝트 libs에 추가합니다. libs 폴더는 app 디렉토리 아래에 생성합니다. 앱레벨 build.gradle 파일에 aar 관련 내용(implementation fileTree(dir: "libs", include: [".jar", ".aar"]))을 추가합니다. 아래에 build.gradle 파일 섹션 참조하세요.
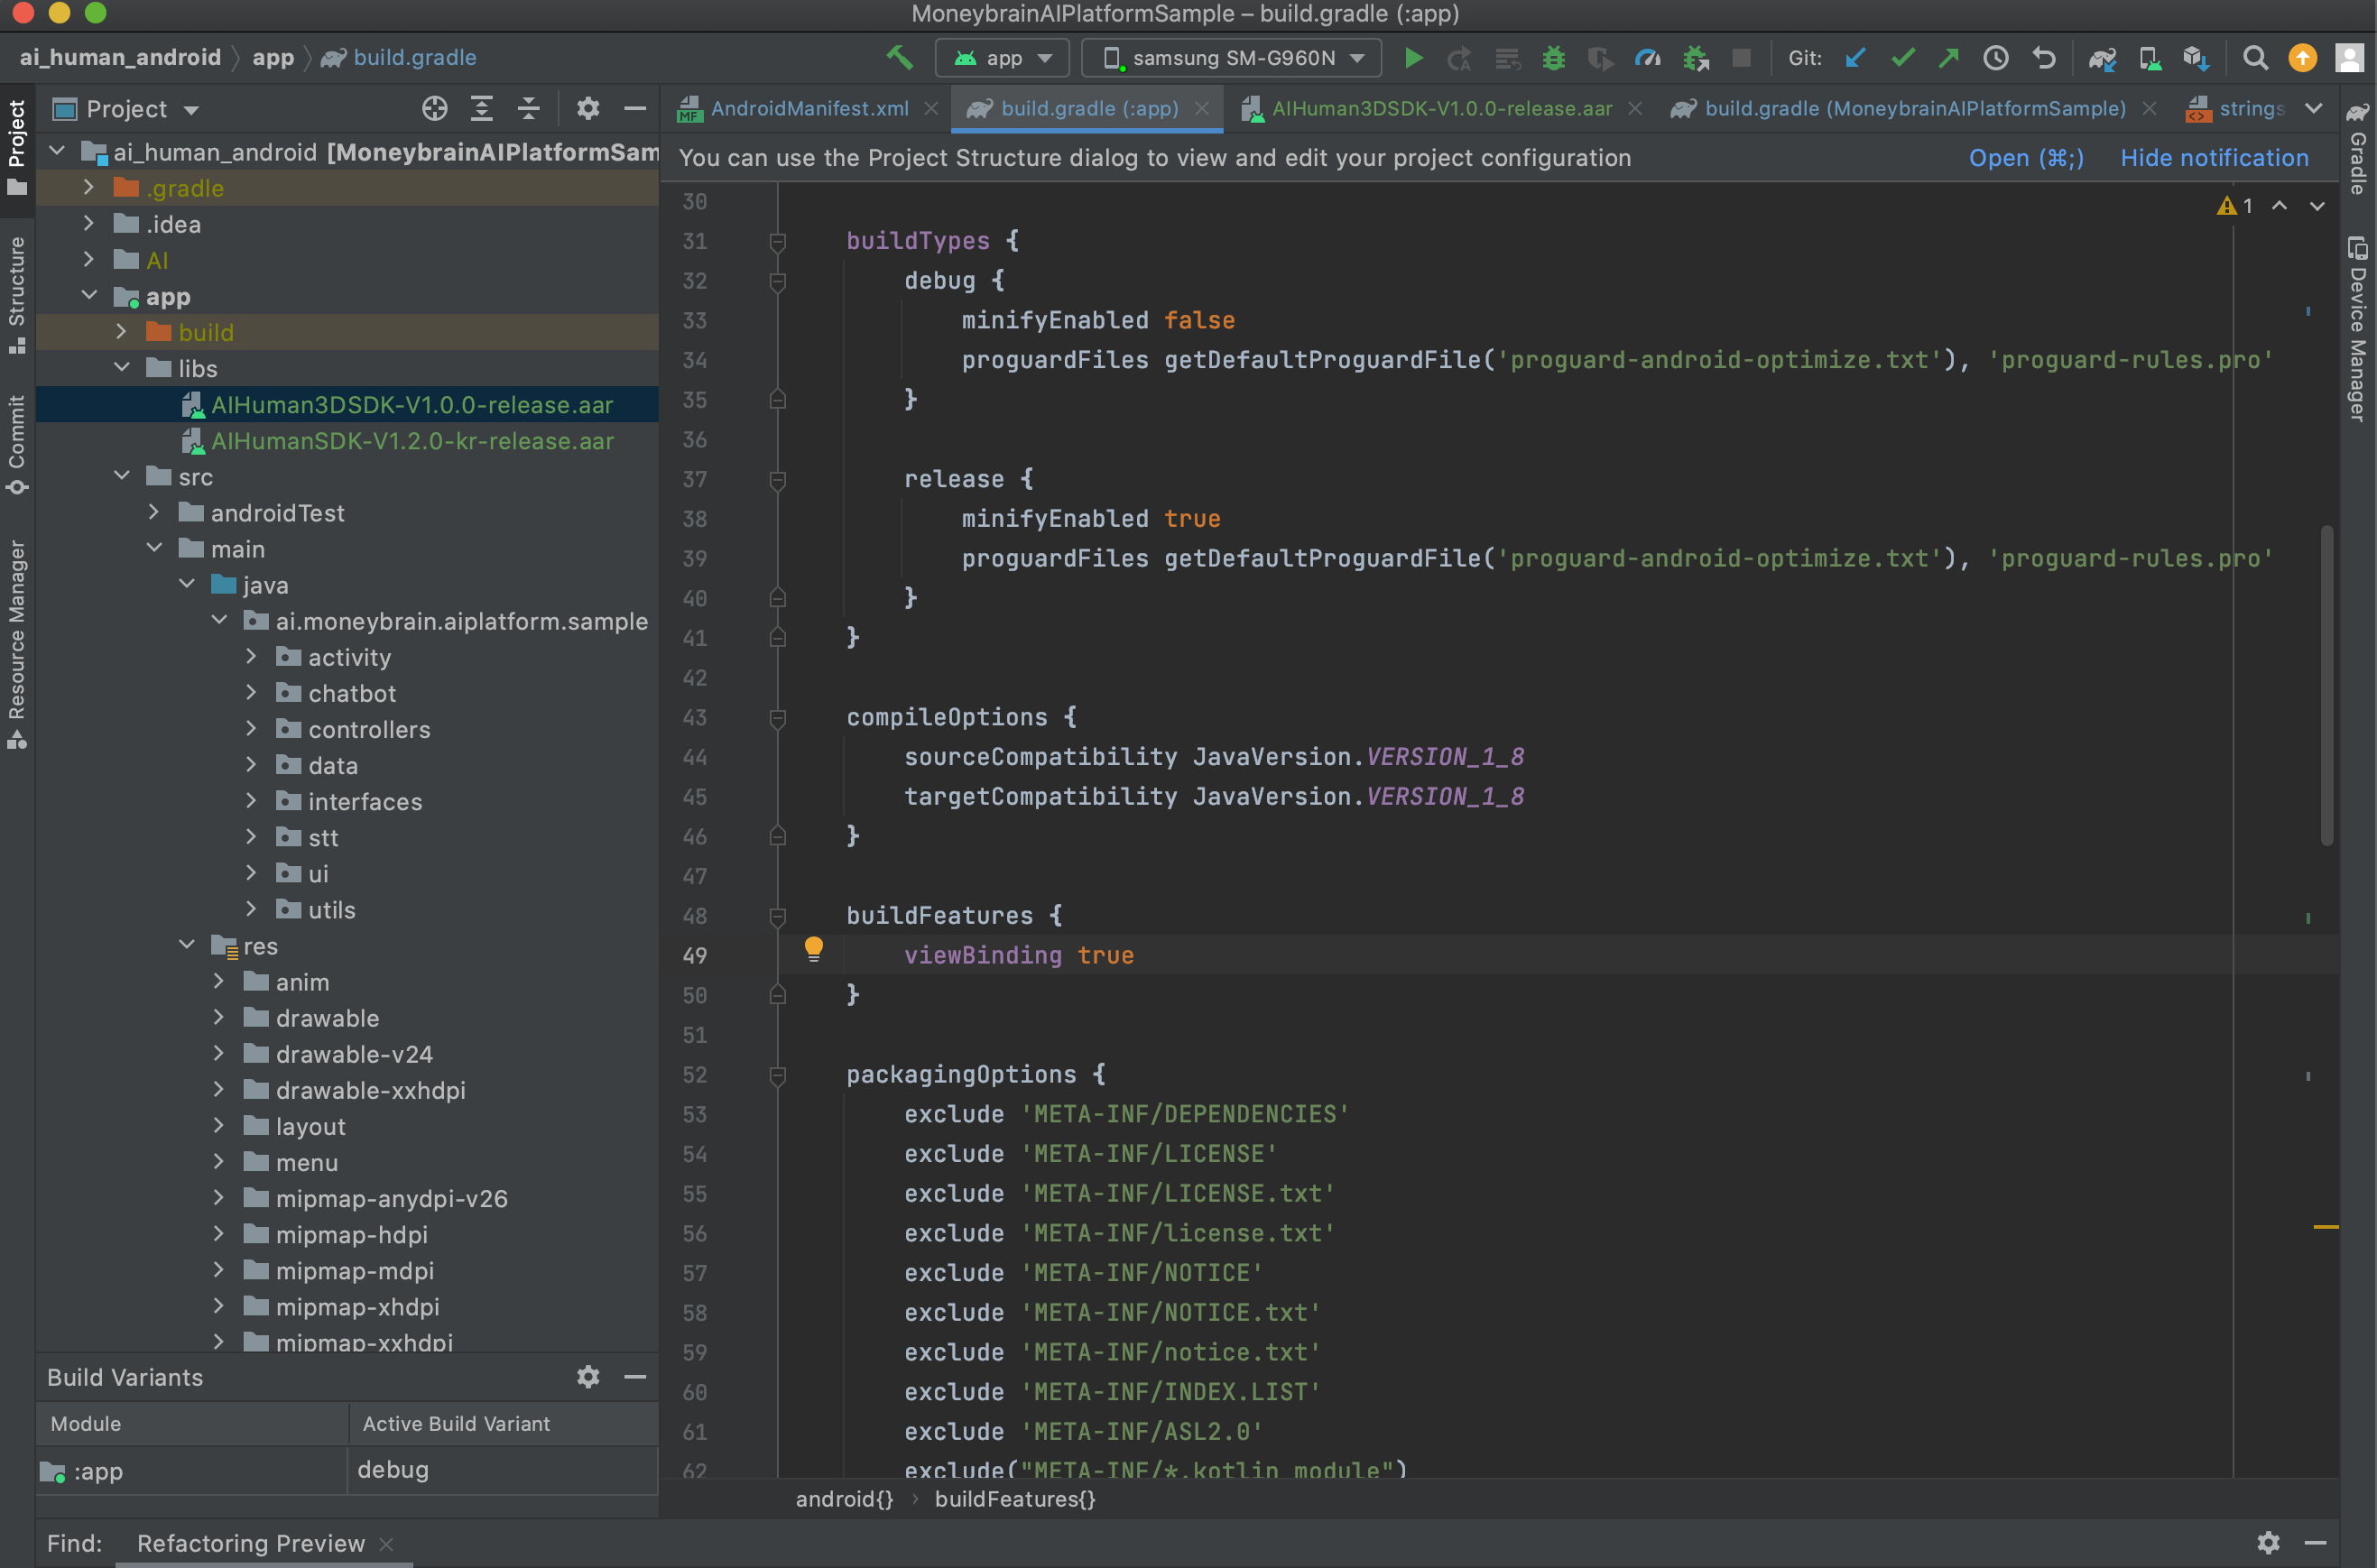
3. app 레벨의 build.gradle 파일 : (샘플 프로젝트의 build.gradle 파일 참조)
아래의 내용들을 설정해야합니다. 더 자세한 사항은 샘플을 참조하여주세요.
- 자바 8 사용 설정 : compileOptions 확인
- packagingOptions : exclude 메타 정보 파일 설정 추가
- viewBinding 설정(옵션) : 꼭 추가할 필요 없음. 하지만 샘플 코드는 사용 설정 되어 있음.
- dependencies 추가 : SDK의 dependency를 추가 후 sync 클릭
android{
  //...
  compileOptions {
      sourceCompatibility JavaVersion.VERSION_1_8
      targetCompatibility JavaVersion.VERSION_1_8
  }

  buildFeatures {
      viewBinding true
  }

  packagingOptions {
      exclude 'META-INF/DEPENDENCIES'
      exclude 'META-INF/LICENSE'
      exclude 'META-INF/LICENSE.txt'
      exclude 'META-INF/license.txt'
      exclude 'META-INF/NOTICE'
      exclude 'META-INF/NOTICE.txt'
      exclude 'META-INF/notice.txt'
      exclude 'META-INF/INDEX.LIST'
      exclude 'META-INF/ASL2.0'
      exclude("META-INF/*.kotlin_module")
  }
}

dependencies {
    //...

    //dependencies for AIHumanSDK AI aar ====================================
    implementation fileTree(dir: "libs", include: ["*.jar", "*.aar"])

    implementation 'androidx.appcompat:appcompat:1.4.1'
    implementation('io.socket:socket.io-client:1.0.1') {
        exclude group: 'org.json', module: 'json'
    }

    implementation 'com.squareup.retrofit2:retrofit:2.6.0'
    implementation 'com.squareup.retrofit2:converter-scalars:2.6.0'

    //dialogflow (option but needs for the sample)
    implementation 'com.google.cloud:google-cloud-dialogflow:2.1.0'

    //jwt authentication
    api group: 'io.jsonwebtoken', name: 'jjwt', version: '0.9.0'
    //==================================== dependencies for AIHumanSDK AI aar

    // MS Speech SDK ====
    implementation 'com.microsoft.cognitiveservices.speech:client-sdk:1.19.0'
    // Diff lib for pronunciation assessment
    implementation "io.github.java-diff-utils:java-diff-utils:4.10"
    // ==== MS Speech SDK
}
4. AndroidManifest.xml 파일 설정
권한 추가 : INTERNET은 필수
<uses-permission android:name="android.permission.INTERNET" />
application 속성 추가 "Namespace 'tools' is not bound" 에러가 발생하면 Create Namespace declaration을 눌러줍니다.
<application
    android:usesCleartextTraffic="true"
    tools:replace="android:icon,android:theme">
3D 캐릭터를 사용할 액티비티 설정 (사용하는 경우)
<activity android:name=".activity.UnityActivity"
    android:screenOrientation="fullSensor"
    android:configChanges="mcc|mnc|locale|touchscreen|keyboard|keyboardHidden|navigation|orientation|screenLayout|uiMode|screenSize|smallestScreenSize|fontScale|layoutDirection|density"
    android:hardwareAccelerated="false"
    android:theme="@style/UnityThemeSelector.Translucent"
    android:process=":Unity"/>
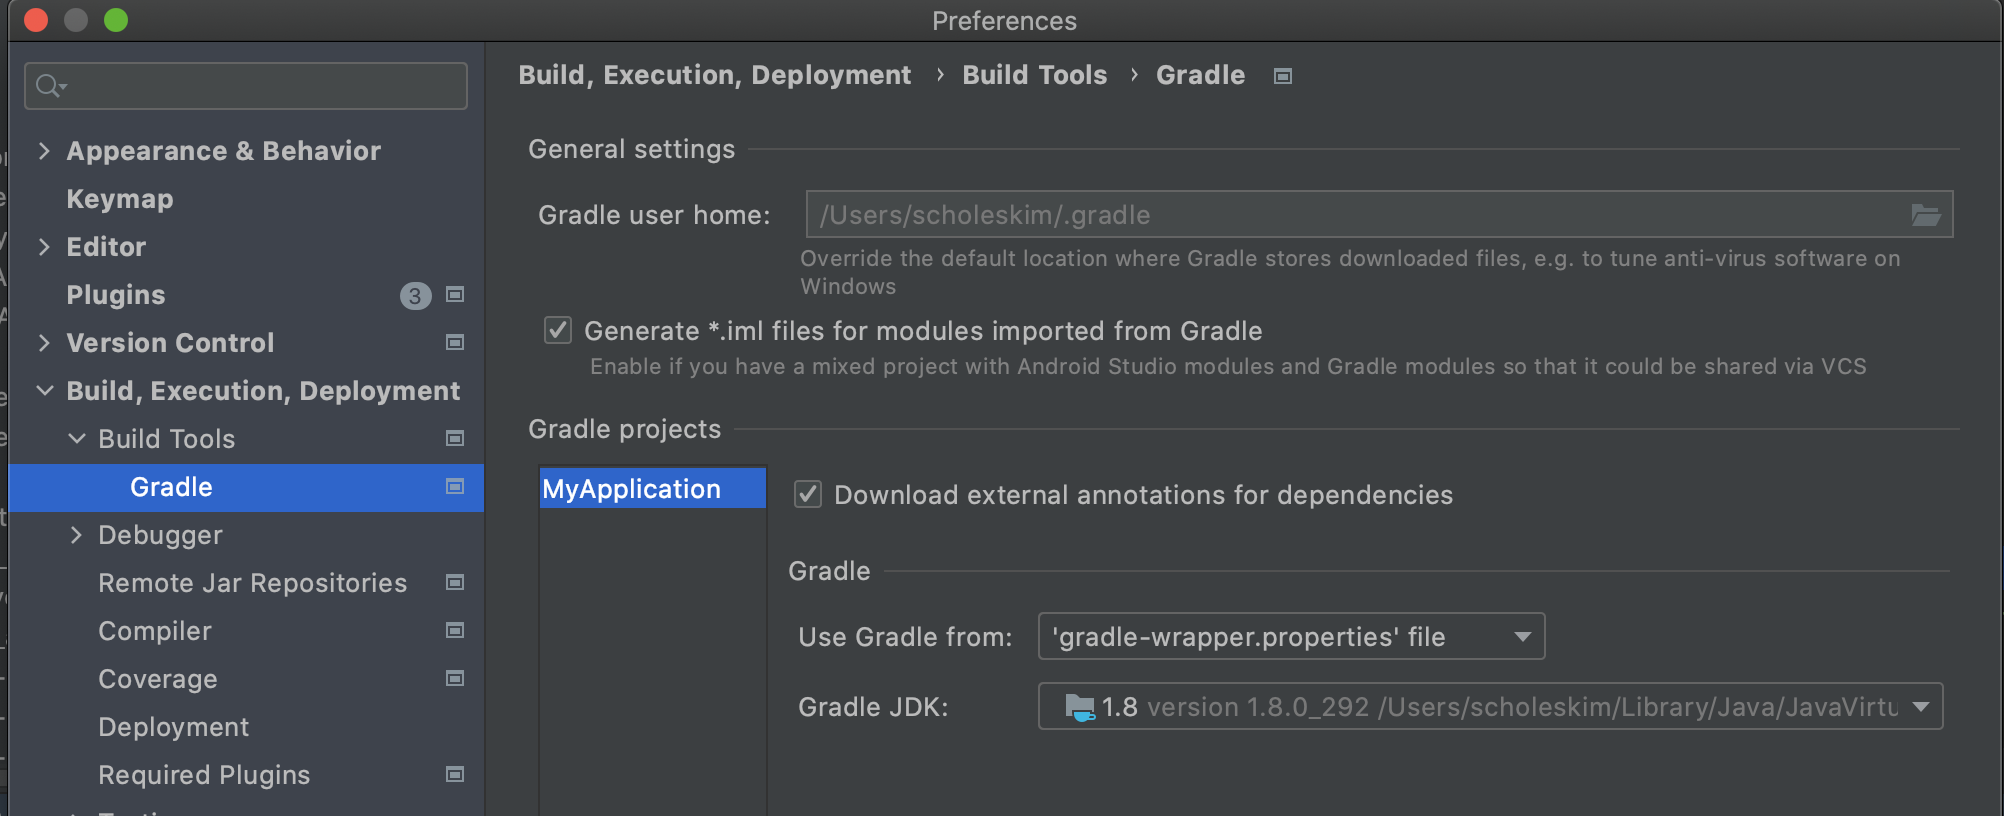
5. Gradle JDK 설정 (11)
android studio articfox이상 버전을 사용중이면 "Android Gradle plugin requires Java 11 to run. You are currently using Java 1.8." 에러가 발생합니다. 맥OS 기준 탑메뉴 > preference > build, Execution, Deployment > Build Tool > Gradle > Gradle JDK > 11 버전을 선택합니다. Java 11 버전이 설치되어있지 않으면 오라클 웹사이트 에서 jdk 11 버전을 다운로드 받아 설치합니다. 링크